ActivityHero makes it easy to add schedules and registration links to your website.
Widget Types
Create a New Widget
Customize Your Widget
Widget Uses
A widget in ActivityHero is a link or code snippet that allows families to register for your offerings outside of the ActivityHero marketplace - for example, on your website or in a marketing email.
After you enter your schedules on ActivityHero, they appear on your website as soon as you add the widget code to your web page. Widgets show session availability, discounts, additional fees, and enable users to register online without leaving your website.
Widget Types
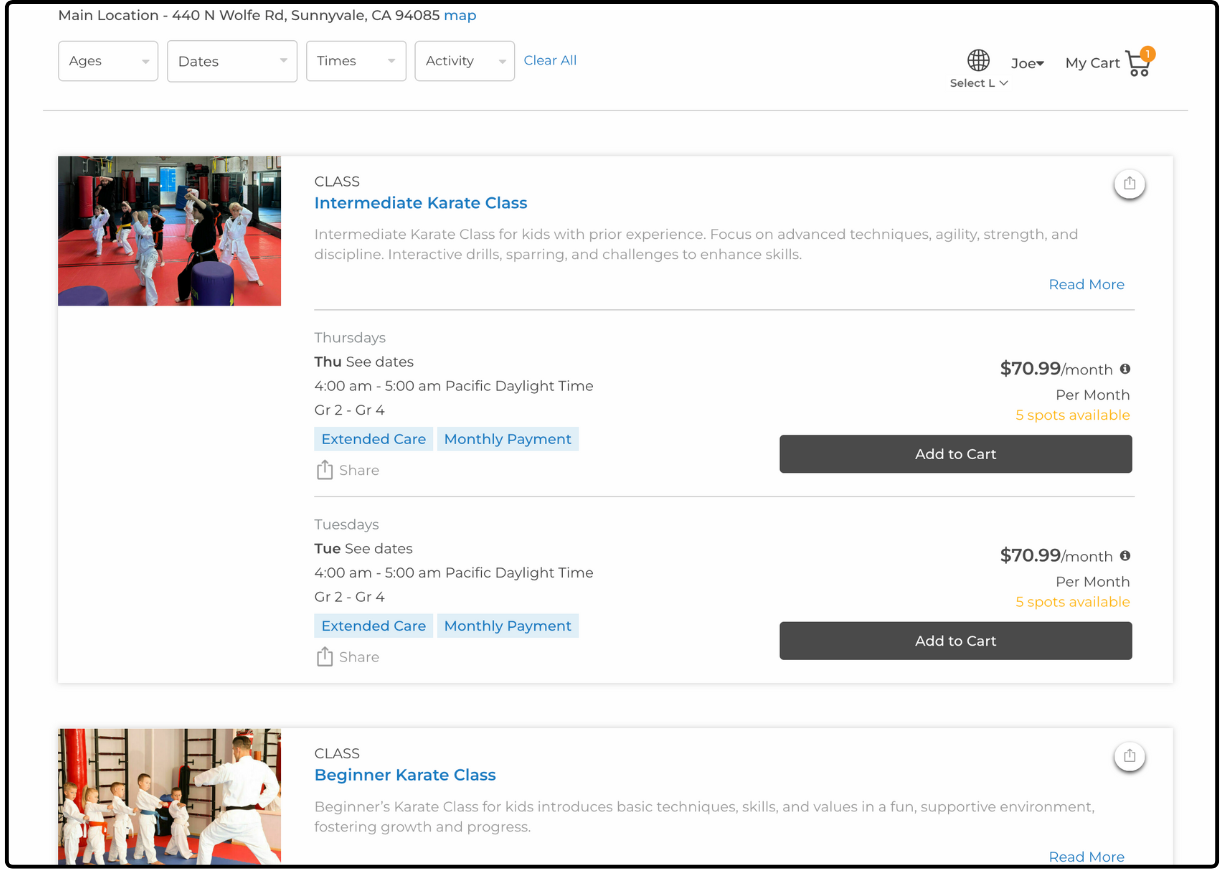
The List View uses photos and has a clean, modern layout for both desktop and mobile view. The first 250 characters of your activity description appear in the widget.
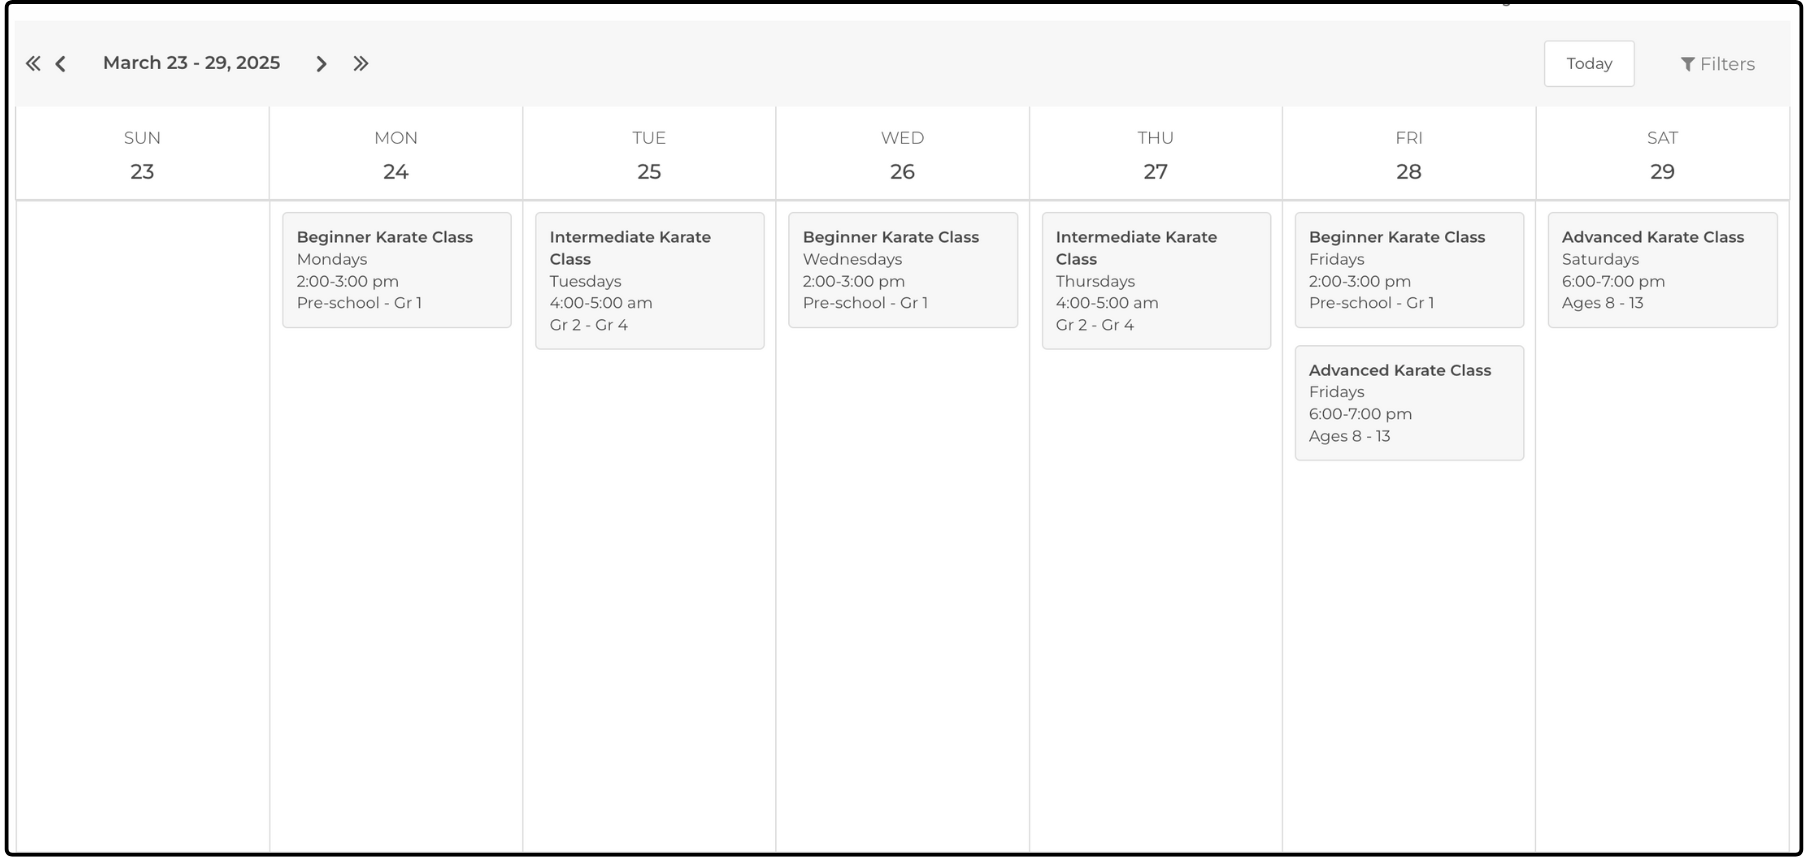
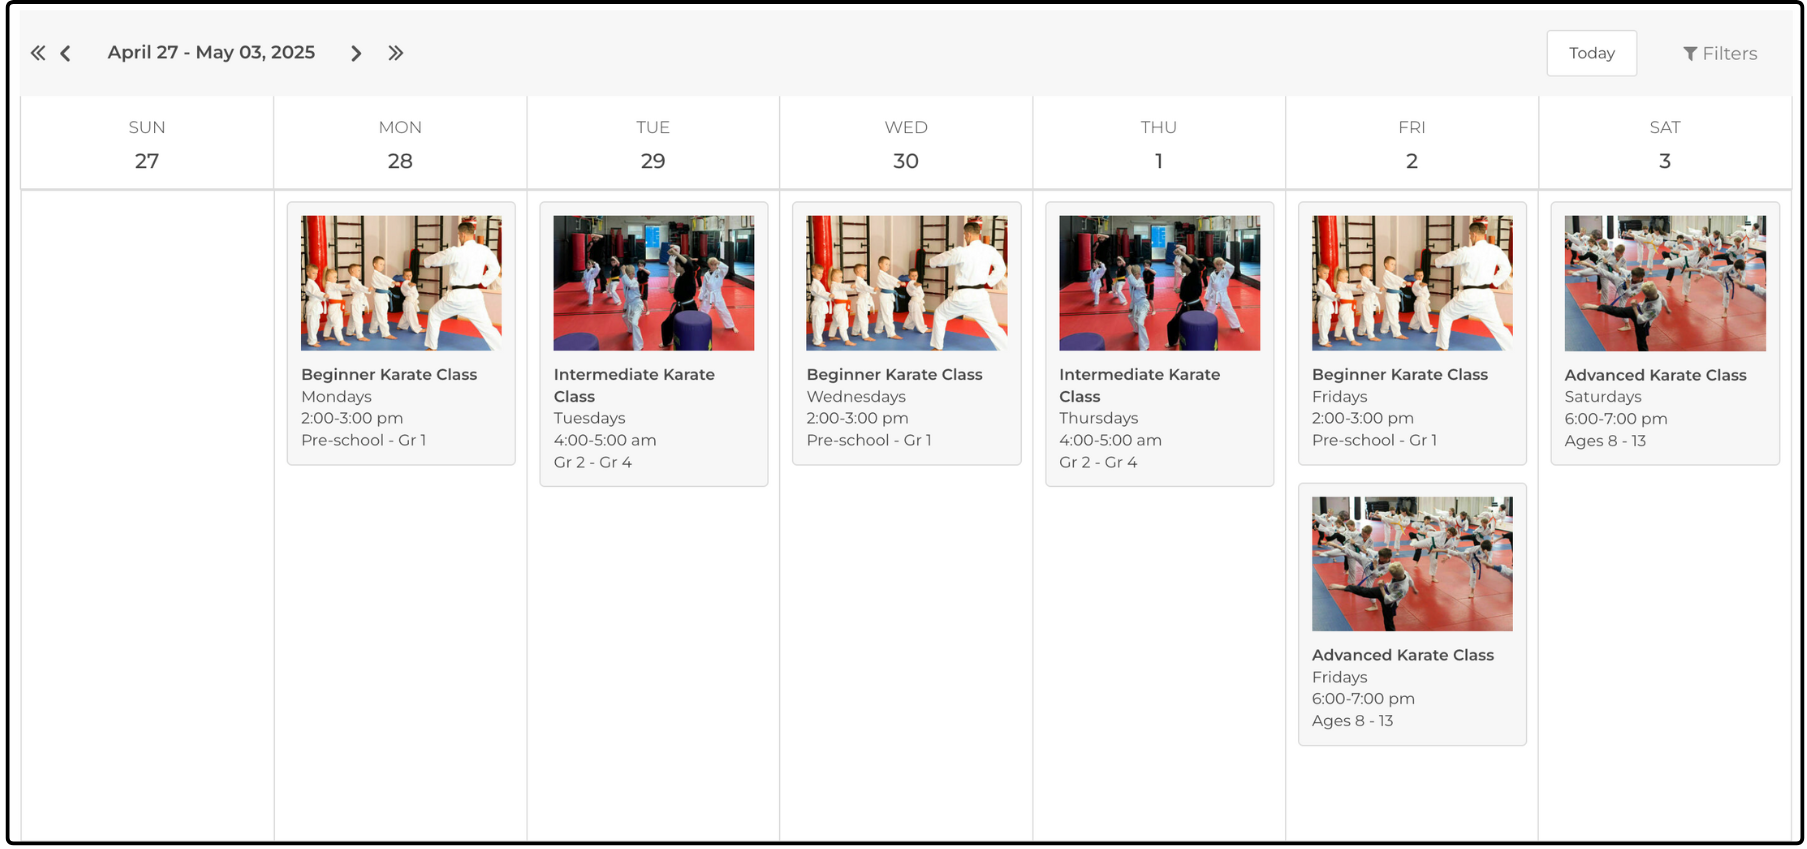
The Calendar View displays a one-week calendar view of your activities. This view is best if you hold many classes on multiple days, or have many single-day classes. With the Calendar View you have the option to include photos or leave them out.
Calendar View with no photo
Calendar View with Photo
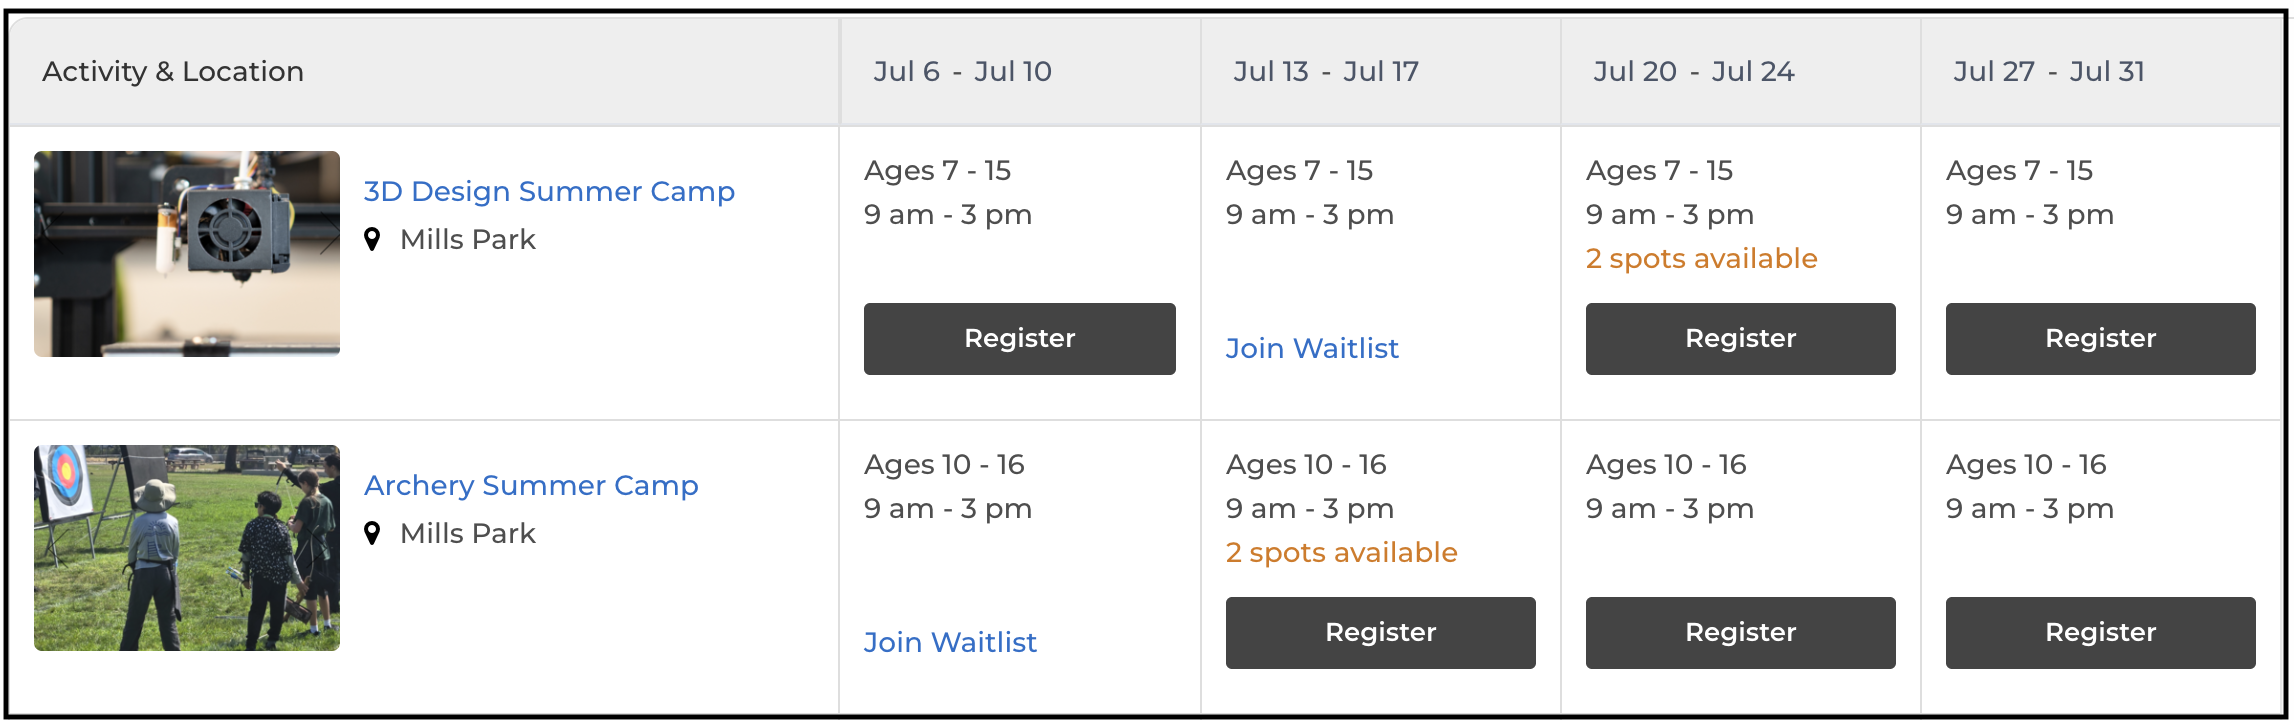
The Table View allows you to select a date range and organize your sessions into a table. The rows are your activities, and the columns are the dates of the sessions. This view is popular for summer camps to show the available weeks and themes.
Create a New Widget ↑
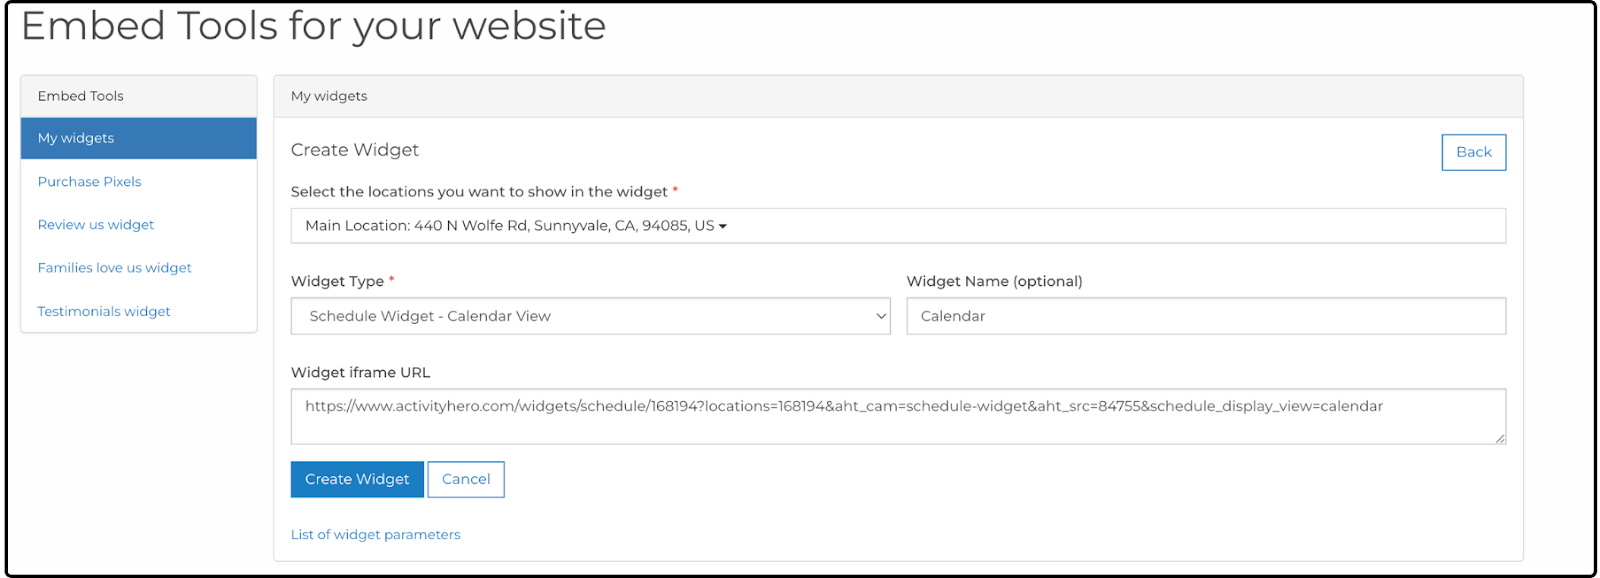
- Sign in to your ActivityHero account and go to Dashboard Home
- Navigate to Tools for Your Website > Online Registration Widget
- Click Create Widget on the right side of the page.
- Select the locations you want to appear in your widget. Note: if you select a location that is marked Unpublished or not used, sessions marked with this location do not appear in the widget.
- Select a widget type, and name your widget. The Widget URL field updates automatically as you make changes.
- Click Create widget to generate your widget.
Customize Your Widget ↑
You can customize how the registration appears on your site by adding items from the list below. Add the parameters to the Widget iframe URL, separated by an ampersand (&).
- For example, to show On-Demand activities only:
e.g., src="https://www.activityhero.com/providers/schedule_widget?id=16225&on_demand=true"
Customize the Display Order of Activities on Widgets
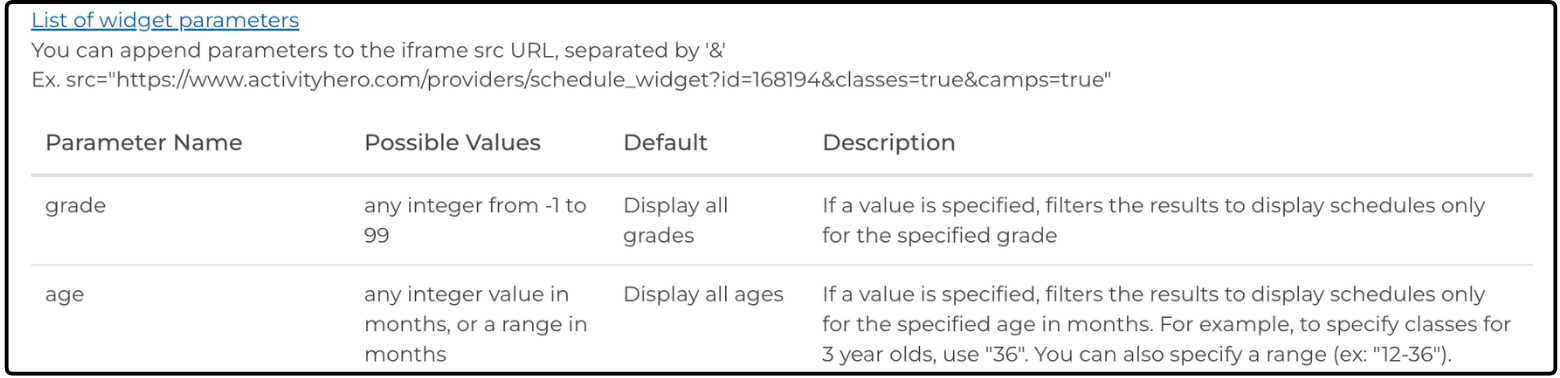
By default, activities are ordered by start date, then alphabetically by activity name. You can customize the order in which activities appear on your widgets/website using the ordered_activities= parameter. Include all activity IDs separated by commas.
Parameter Name |
Possible Values |
Default |
Description |
|
grade |
any integer from -2 to 99 (e.g., -2 = Preschool/Pre-K, -1 = TK, 0 = Kindergarten, 1 = 1st, etc.) |
Display all grades |
If a value is specified, filters the results to display schedules only for the specified grade |
|
age |
any integer value in months, or a range in months |
Display all ages |
If a value is specified, filters the results to display schedules only for the specified age in months. For example, to specify classes for three year olds, use "36". You can also specify a range (ex: "12-36"). |
|
classes |
TRUE |
Display classes |
Display classes |
|
camps |
TRUE |
Display camps |
Display camps |
|
events |
TRUE |
Display events |
Display events |
|
online |
TRUE |
Display online sessions |
Display online sessions |
|
on_demand |
TRUE |
Display On-Demand contents |
Display On-Demand contents |
|
category |
category name |
Display all categories |
Display only activities with the specified category |
|
start_date |
yyyy-mm-dd |
Display all schedules |
Display only schedules that end after this date |
|
end_date |
yyyy-mm-dd |
Display all schedules |
Display only schedules that start before this date |
|
activities |
comma separated activity ids |
Display all activities |
Display schedules of only specified activities |
|
exclude_activities |
comma separated activity ids |
Display all activities |
Exclude schedules of specified activities |
|
exclude_sessions |
comma separated activity schedule ids |
Display all sessions |
Exclude sessions of specified schedule ids |
|
disable_enroll_button |
true, false |
Display CTA on all schedules |
Hides the enroll button from all schedule rows |
|
schedule_display_view |
calendar |
Provider's default display view |
Sets the default display view for schedules |
|
locations |
comma separated location ids |
current location id |
Fetches schedules for all the specified locations |
|
activity_schedules |
comma separated activity-schedule ids |
all published schedules |
Fetches all the specified schedules |
|
show_grade_filter (works only in new schedule widget) |
true/ false |
FALSE |
Shows the grade filter |
|
show_days_filter (works only in new schedule list widget) |
true/ false |
FALSE |
Shows the days filter |
|
photos |
true/ false |
FALSE |
Shows photos in calendar view |
|
private_only |
true, false |
FALSE |
Shows only private activities |
|
ordered_activities (works only in new schedule widget) |
Comma separated activity ids |
Display all activities |
Sorts the activities by activity ids |
To edit a Widget:
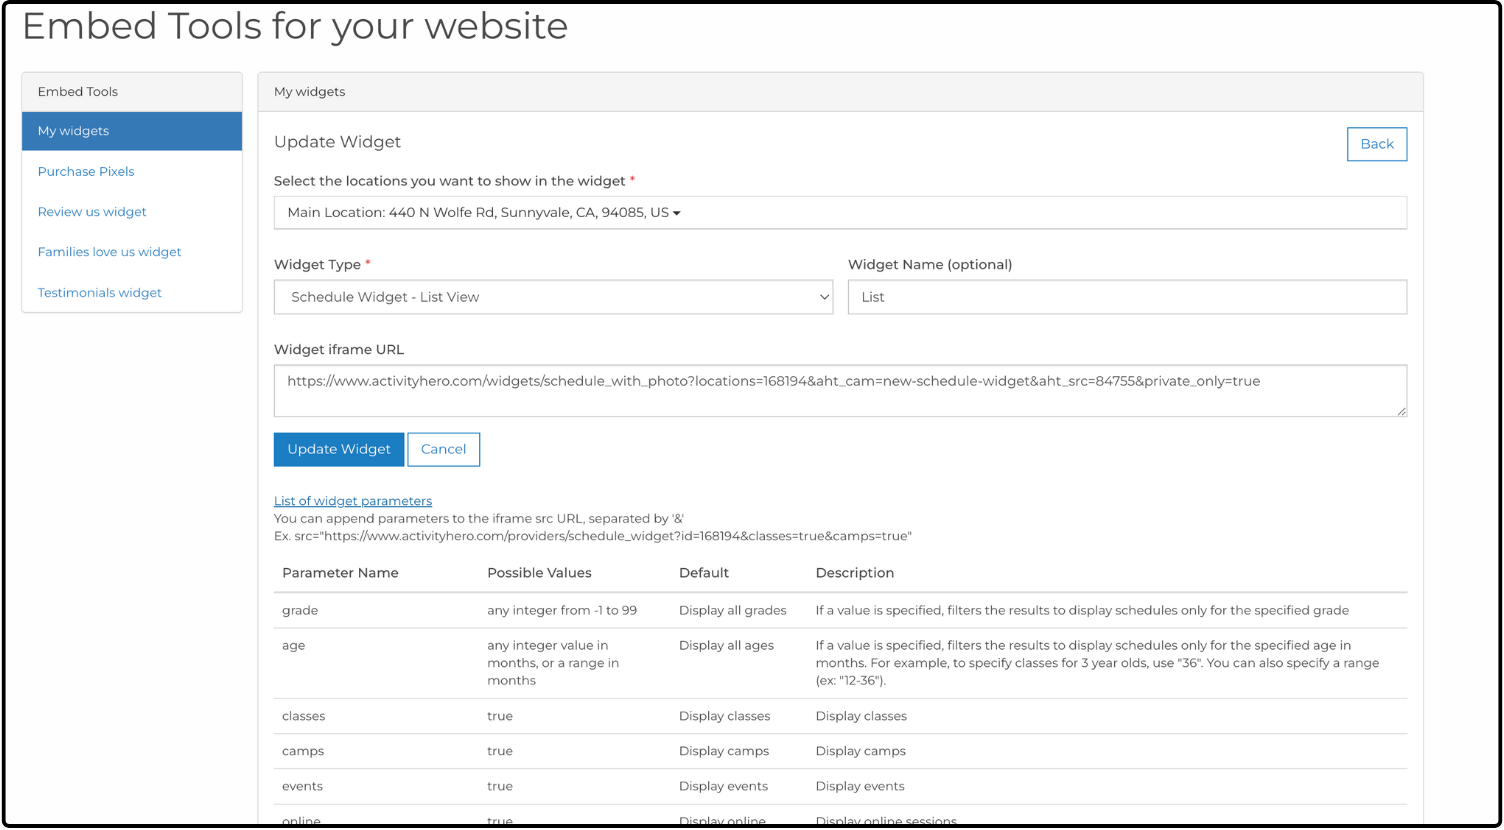
- Sign in to your ActivityHero account and go to Dashboard Home
- Navigate to Tools for Your Website > Online Registration Widget
- Click Edit next to the widget you want to update
- Add parameters to the Widget iframe URL section using the format listed above.
- Click Update Widget.
Widget Uses ↑
Three types of widgets are available for use on your website. The one you use varies based on how you want to take registration.
- Embed full widget directly on your page: This code states "Place this code wherever you want the widget to appear on your page". When you use this code, your widget appears at full size and includes all sessions. Your web page adjusts to the size of the available sessions.
- Embed full widget in an iframe on your page: This code states "If you just want to embed the widget in an iframe, use this code". Use this code if you are placing your widget inside a web page and do not want to adjust the overall size of the page. Instead your widget appears within another box on the page, which allows scrolling to see all available sessions.
- Link to the widget via a button or other element on your web page: This code states "If you just want to link to the widget, use this code instead". The page that becomes available includes your business branding. Parents can log in or sign up to complete their registration.
Your sessions are displayed in the widget based on the earliest session start and end dates. If the dates are the same, the following criteria are used to sort the sessions:
- Start and end time (earliest first)
- Activity name
- Session name
- Grades (lowest first)
- Ages (lowest first)
- Price (lowest first)
For more information on accepting registrations using ActivityHero, submit a support request.
Was this article helpful?
That’s Great!
Thank you for your feedback
Sorry! We couldn't be helpful
Thank you for your feedback
Feedback sent
We appreciate your effort and will try to fix the article