You can use ActivityHero's Send Email tool to reach users who registered for a specific session, or everyone who has subscribed to your emails through ActivityHero.
Send an Email
Session Updates
Marketing Emails
Composing an Email
Templates
Send an Email
- Sign in to your ActivityHero account.
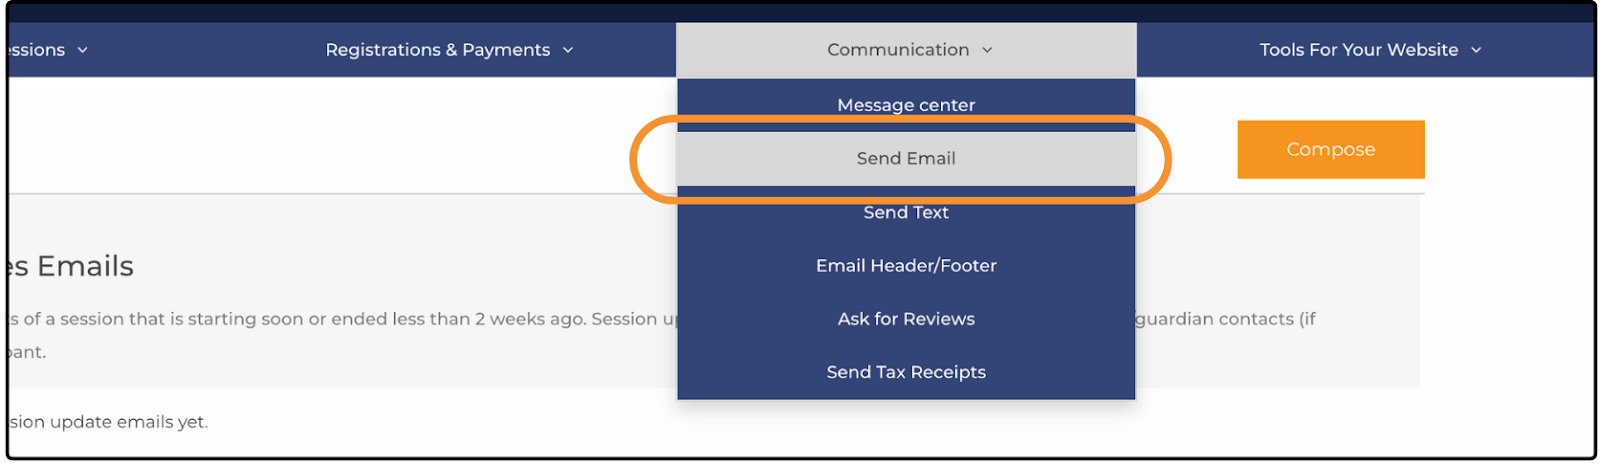
- Hover over Communication and select Send Email.
- Click Compose to start a new email.
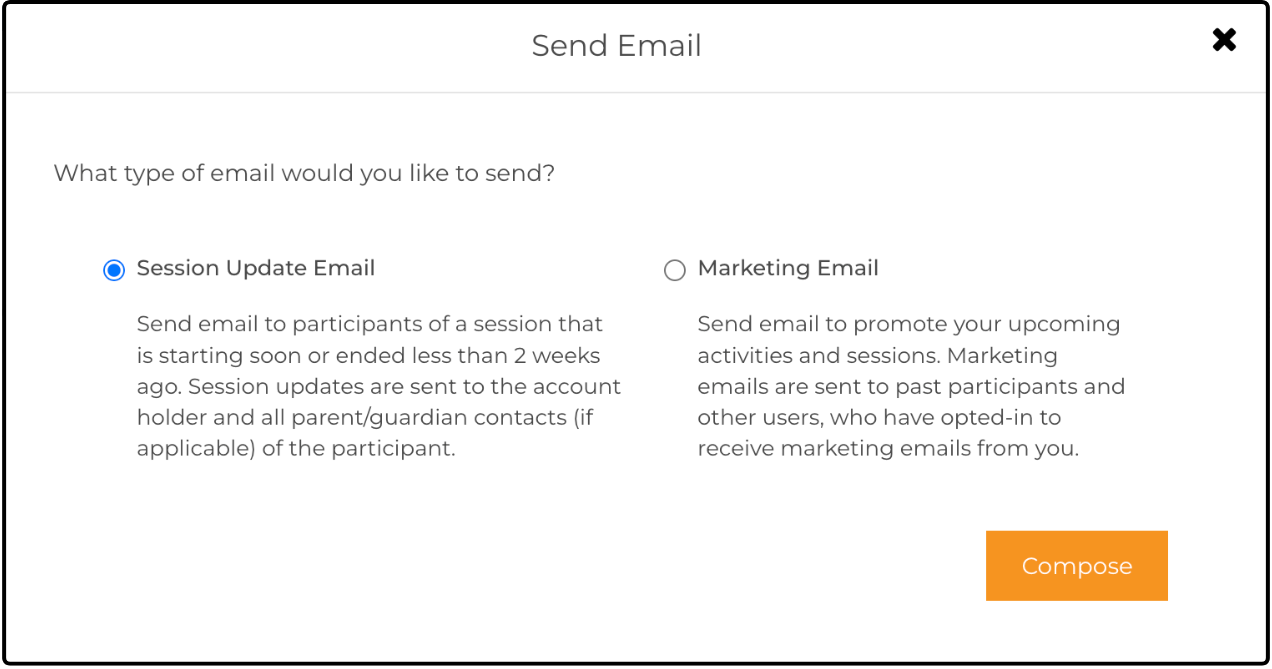
If you have admin or manager access, you can send both Session Updates and Marketing Emails. Other roles can send only Session Updates.
To email a single participant, use the Message Participant option instead. For more details, see our help article on direct messaging.
Session Updates ↑
Use Session Update emails to share important information with participants registered for specific sessions. These can include:
- Camp or class location updates
- Reminders about what to bring
- Other session-specific details
Note: Do not use Session Updates for promotional or marketing content.
To announce new classes, sales, or promotions, send a Marketing Email instead, as explained below.
Who Receives Session Updates?
Session Update emails are sent to all contacts listed in the registration, including:
- The account holder
- Contact 1
- Contact 2 (if available)
Marketing Emails ↑
Use Marketing Emails to share general promotional content, such as:
- New sessions or classes
- Upcoming sales
- Private promo codes
- Seasonal announcements
These emails are ideal for reaching a broader audience interested in your programs.
Who Receives Marketing Emails?
Marketing Emails are sent only to subscribed users, which can include:
- Past customers
- Users who opted in via your business page
- Anyone who requested information about your activities
Note: Contacts listed on a session registration (e.g., Contact 1 or 2) do not receive Marketing Emails unless they are subscribed.
Composing an Email ↑
Create a New Email
- Click Compose in the top right, then select either Session Update Email or Marketing Email in the pop-up.
- Click Compose to begin filtering sessions.
Filter and Select Participants
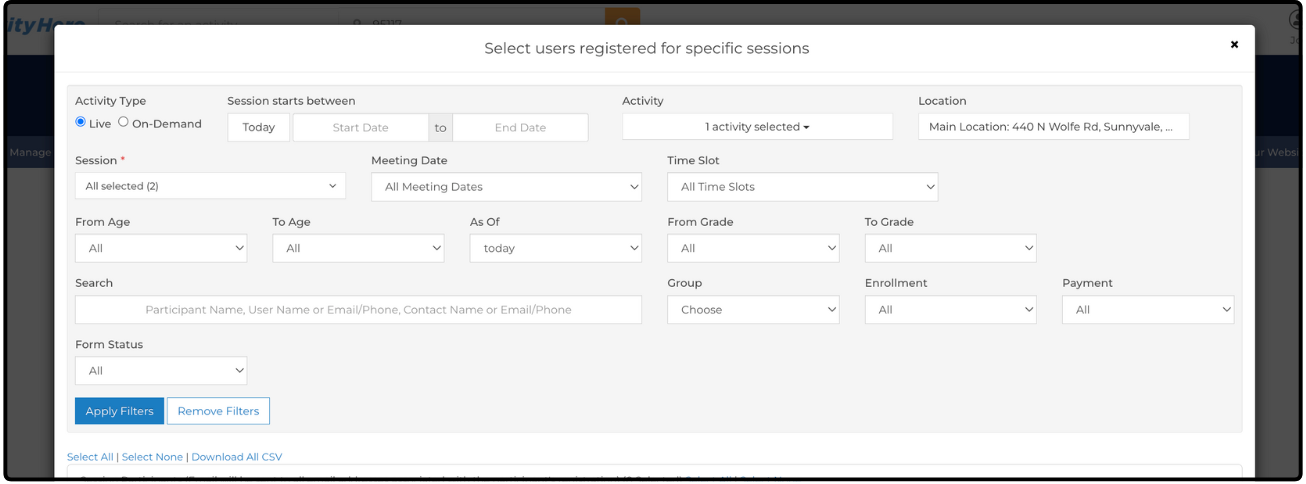
Use the Select Users page to filter sessions by:
- Date
- Activity
- Location
- Meeting date
Use the search bar to find participants by name.
Click Apply Filters to see the filtered list of participants.
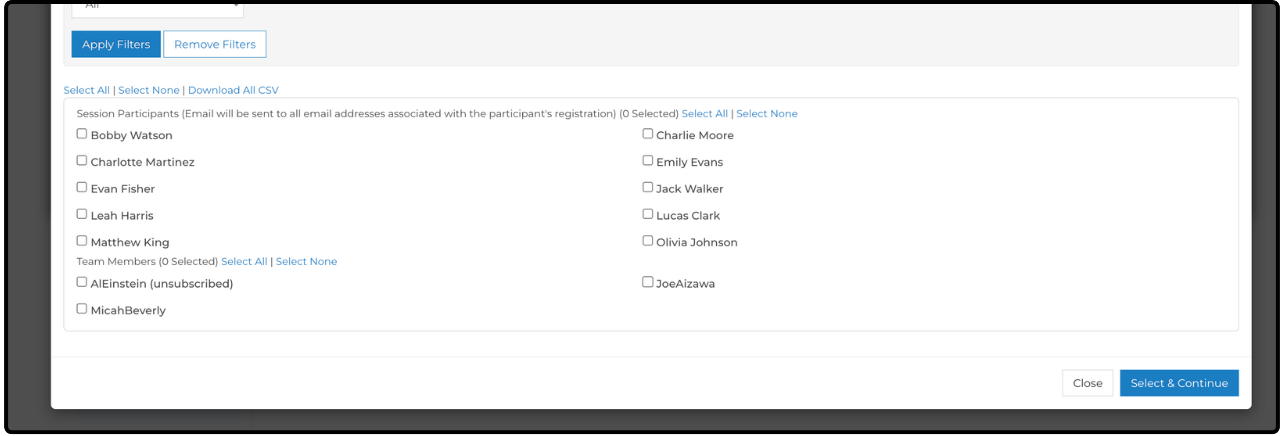
Once filtered:
- Use Select All or the check boxes to select participants individually.
- Emails are sent to all addresses on each participant's registration.
- Team members appear at the bottom-select who should receive a copy.
Click Select & Continue to confirm recipients.
Draft Your Email
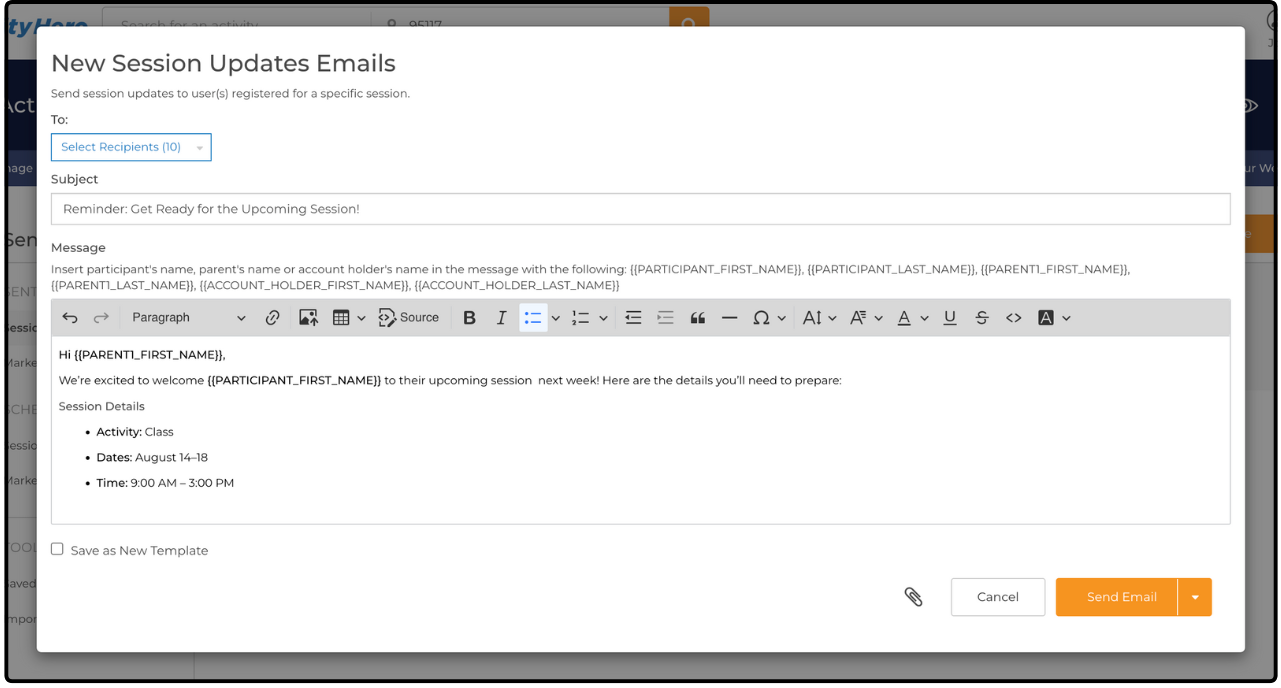
- Use HTML formatting (colors, links, images - pasted or linked).
- Add attachments (max size: 10 MB) using the paperclip icon.
- Insert dynamic fields using double curly brackets ({{ }}):
- PARTICIPANT_FIRST_NAME
- PARTICIPANT_LAST_NAME
- PARENT1_FIRST_NAME
- PARENT1_LAST_NAME
- ACCOUNT_HOLDER_FIRST_NAME
- ACCOUNT_HOLDER_LAST_NAME
Send or Save
Send Email
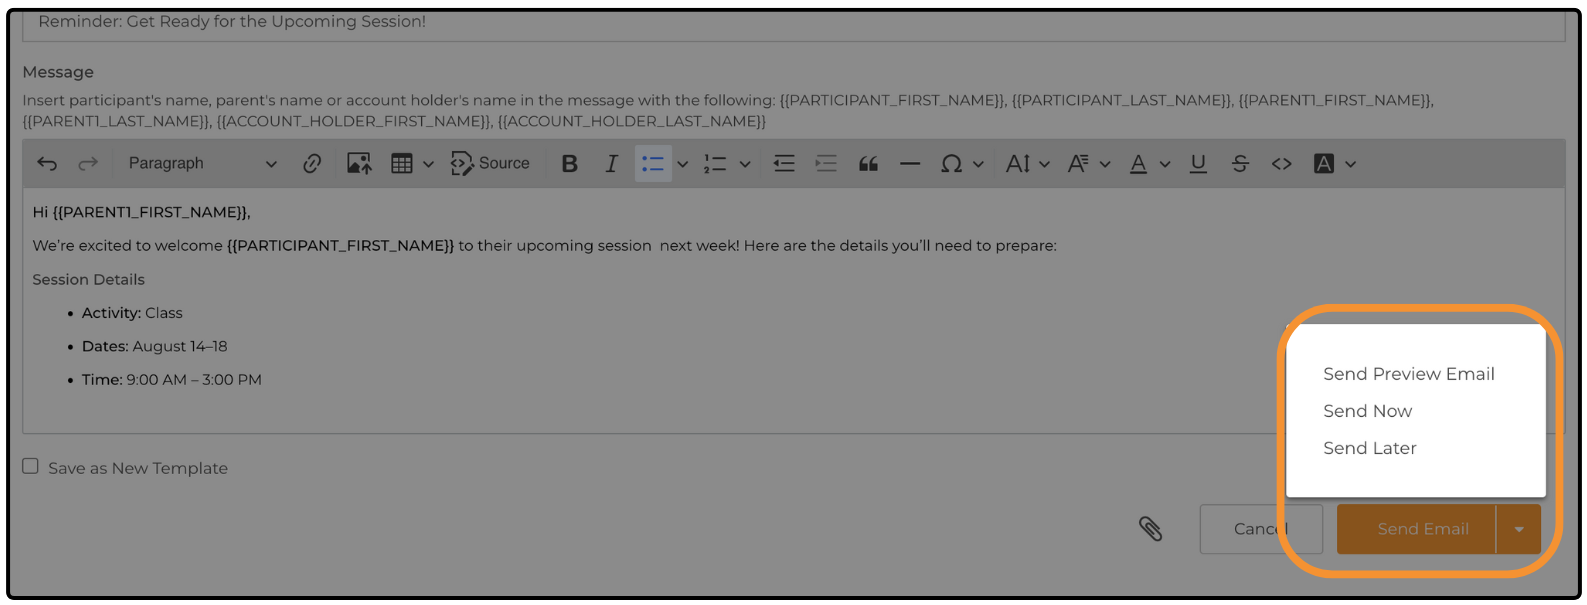
Click Send Email to see delivery options.
- Send Preview Email - Send a test email to yourself
- Send Now - Send the email immediately
- Send Later - Select your preferred date and time to send. This option sends to all participants that match the selected filters at the date and time set. If you select specific individuals, only those individuals receive the email.
Save as Template
To reuse the email later, select the Save as New Template check box before sending.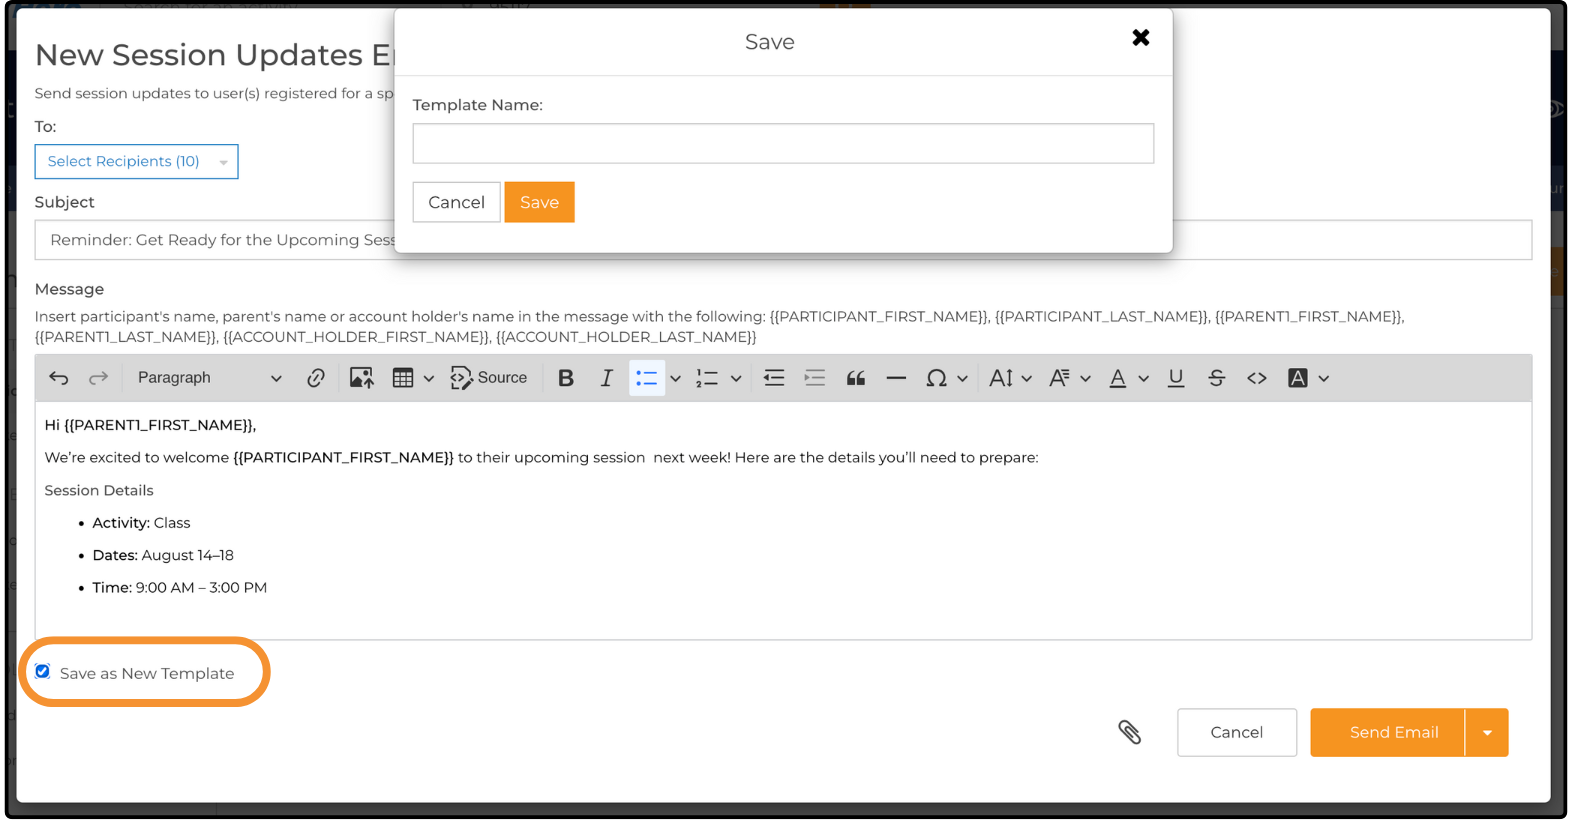
Templates ↑
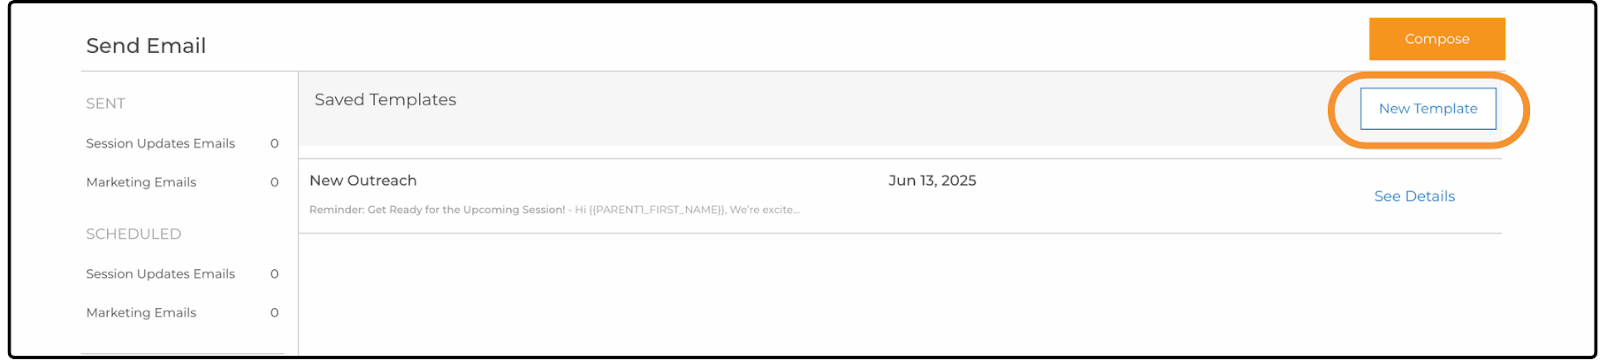
If you send similar emails regularly, save time by creating and reusing templates.
Access Saved Templates
- Templates are stored alongside previously sent emails (Session Updates and Marketing Emails).
- Find them in the Saved Templates section of the left sidebar, where you can create, edit, or delete templates.
Create a New Template
- In the left menu, navigate to Saved Templates > New Template.
- Give your template a name and draft the email as you would normally.
- Click Save when you are done.
Create a Template from a Sent Email
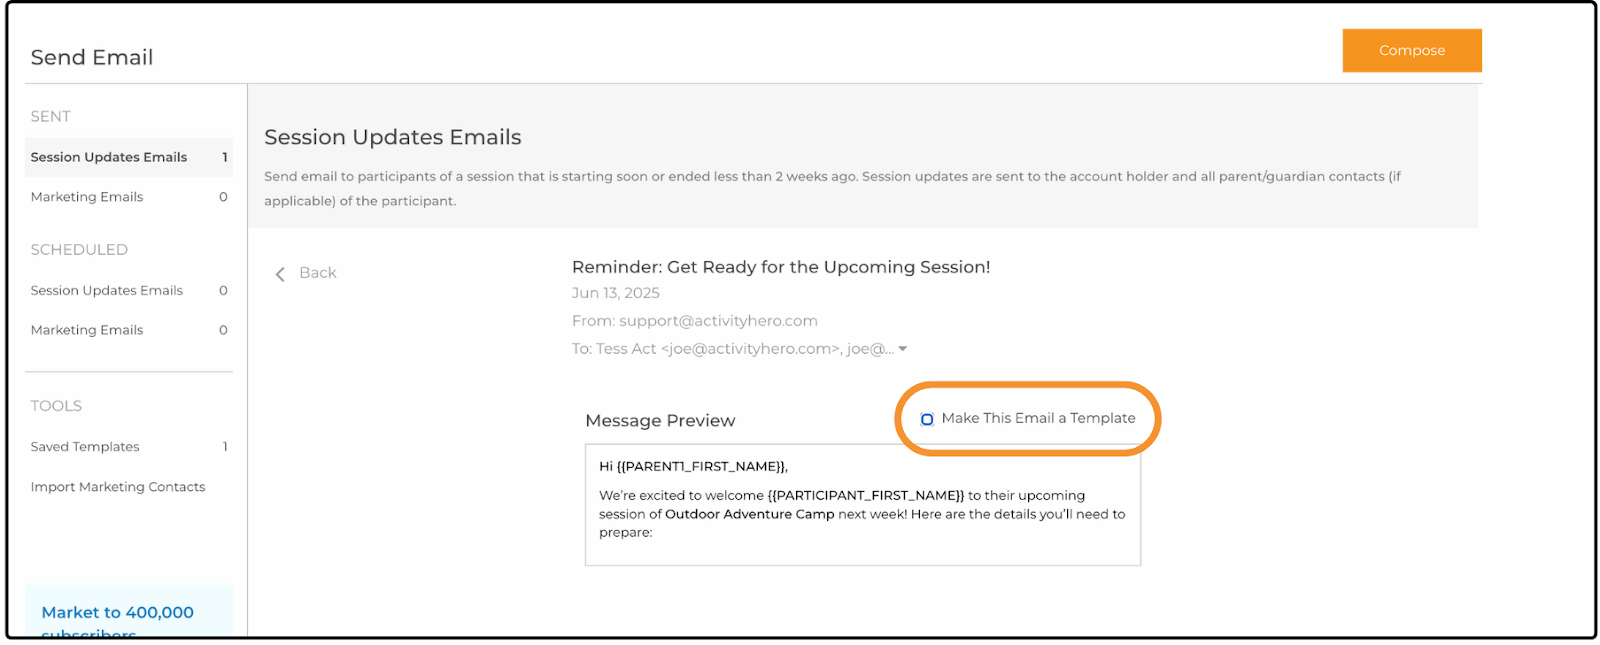
You can also turn a previously sent email into a template:
- In the left sidebar, select Session Updates Emails or Marketing Emails.
- Scroll to the email you want to reuse and click See Details.
Emails sent before February 14, 2020, appear in the Marketing Emails list.
- Select Make This Email a Template.
- A box appears - type a unique name and click Save.
Important: If you are saving a template from an email sent before February 14, 2020, check for a footer message. If present, delete it and click Update to save your changes.
Related Articles ↑
Was this article helpful?
That’s Great!
Thank you for your feedback
Sorry! We couldn't be helpful
Thank you for your feedback
Feedback sent
We appreciate your effort and will try to fix the article