The Waitlist Automation feature helps reduce manual work by automatically inviting families from your waitlist when spots open up. ActivityHero handles the invitation process for you based on your selected preferences.
Enable Waitlist Automation
Viewing Waitlist Automation Status
When Does Automation Start?
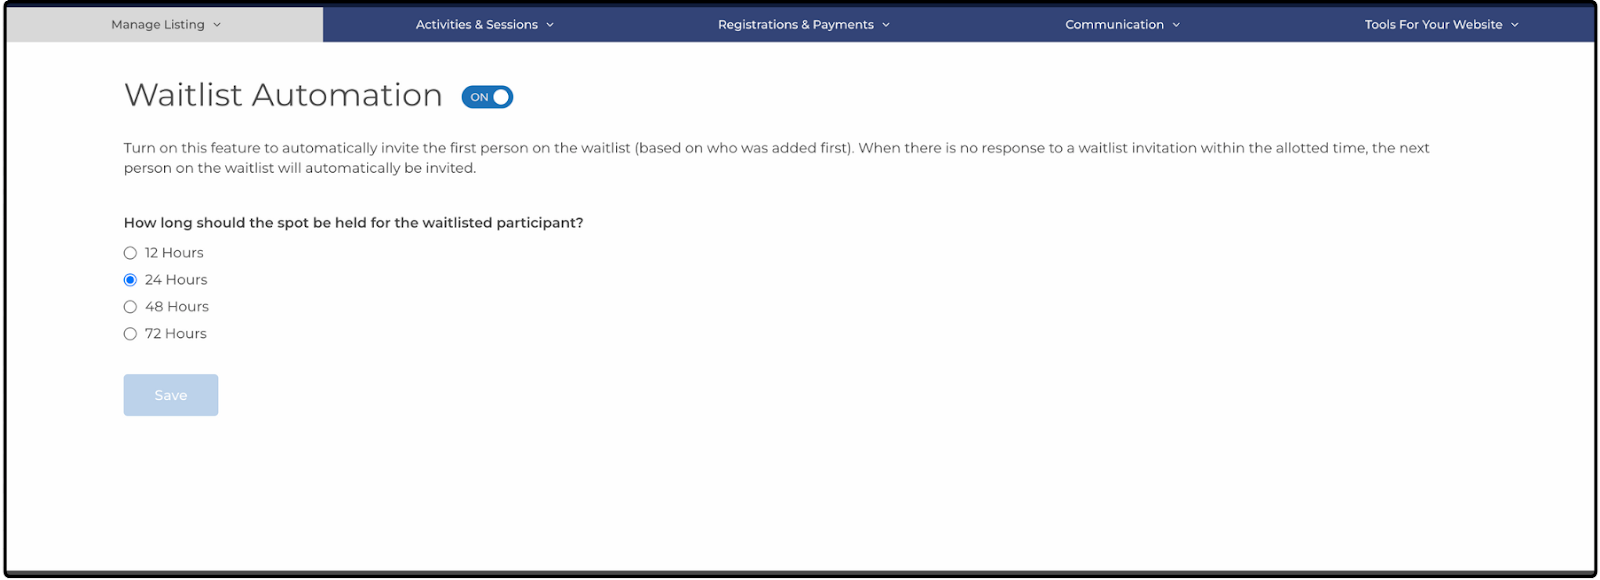
Enable Waitlist Automation
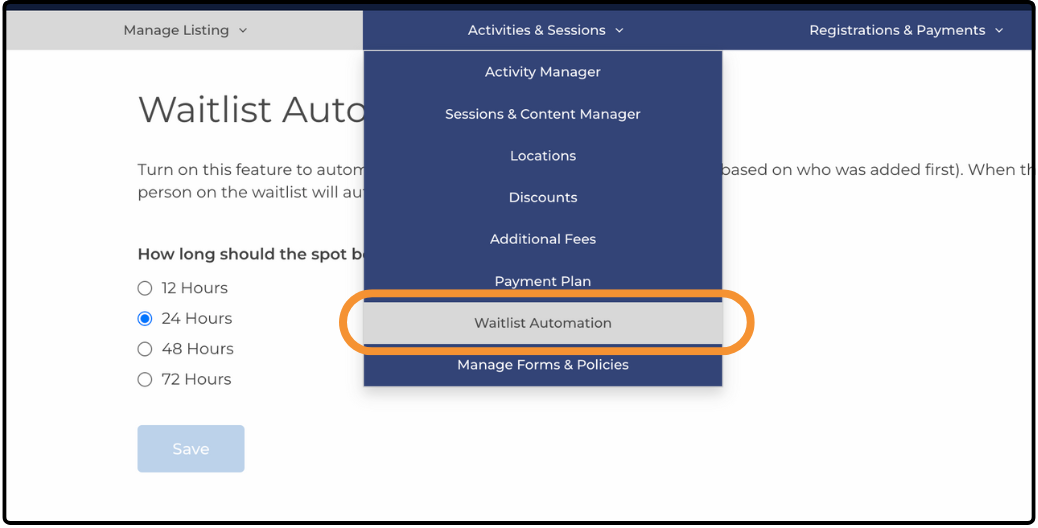
From your dashboard, navigate to Activities & Sessions > Waitlist Automation.
A toggle switch set to Off is displayed. Click it to enable automation.
After you enable automation, select how long to hold a spot for each invited participant:
- 12 hours
- 24 hours
- 48 hours
- 72 hours
If there is no response within the selected timeframe, the system automatically invites the next participant on the waitlist.
Viewing Waitlist Automation Status ↑
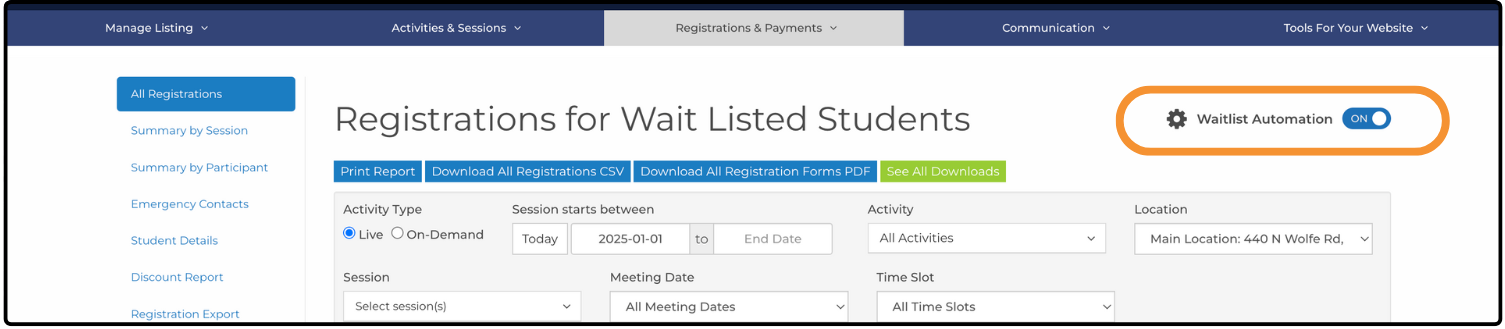
You can check the status of Waitlist Automation from the following reports:
- Registration Reports
- Waitlist Report
- Pending Waitlist Invitation Report
The top-right corner of these reports displays whether automation is On or Off.
Note: Clicking the toggle icon here does not change the status. To modify automation settings, click the gear icon to go to the Waitlist Automation settings page.
When Does Automation Start? ↑
Inviting Off the Waitlist
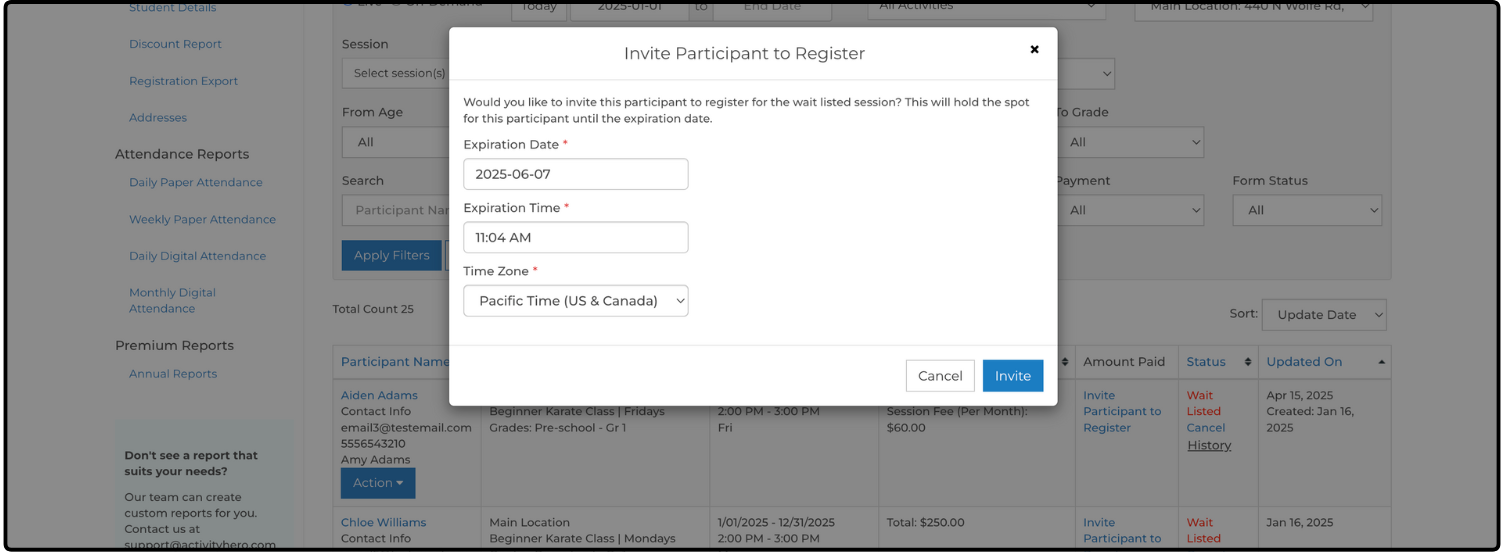
Automation begins after you invite the first participant off the waitlist.
The expiration for that invitation automatically follows the timing set in your automation preferences.
If the participant does not register in time-or cancels-the next participant on the waitlist is invited automatically.
For more details, check out our help article: What is the Waitlist?
Canceling a Registration
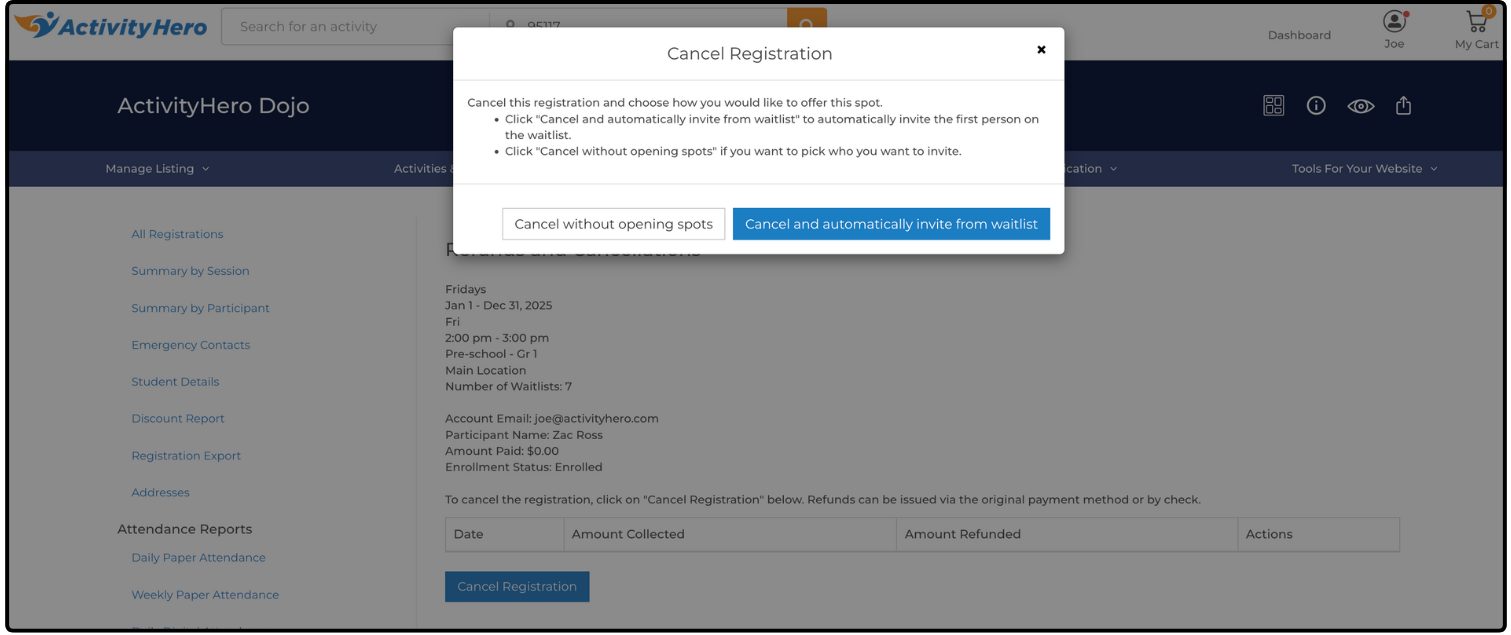
If a participant cancels and the session is waitlisted, automation can take over from there.
You are prompted with two options:
- Cancel and automatically invite from waitlist
- Cancel without opening spots
Selecting the first option automatically extends the invitation to the next waitlisted participant according to your automation settings.
By enabling Waitlist Automation, you can save time and ensure that available spots are offered quickly and fairly to interested families.
Was this article helpful?
That’s Great!
Thank you for your feedback
Sorry! We couldn't be helpful
Thank you for your feedback
Feedback sent
We appreciate your effort and will try to fix the article