Set Up Registration Forms
Form Components
To Create a Cancellation Policy
To Create a Waiver
Assembling the Form
Step 6: Assign the Form to an Activity
Set Up Registration Forms
 Every activity requires a registration form that families use to register for your activity. You can use the default forms for in-person and online activities, or customize your own.
When creating a new form, you can select the standard fields you want to use. You can also create and add custom questions that families answer while registering.
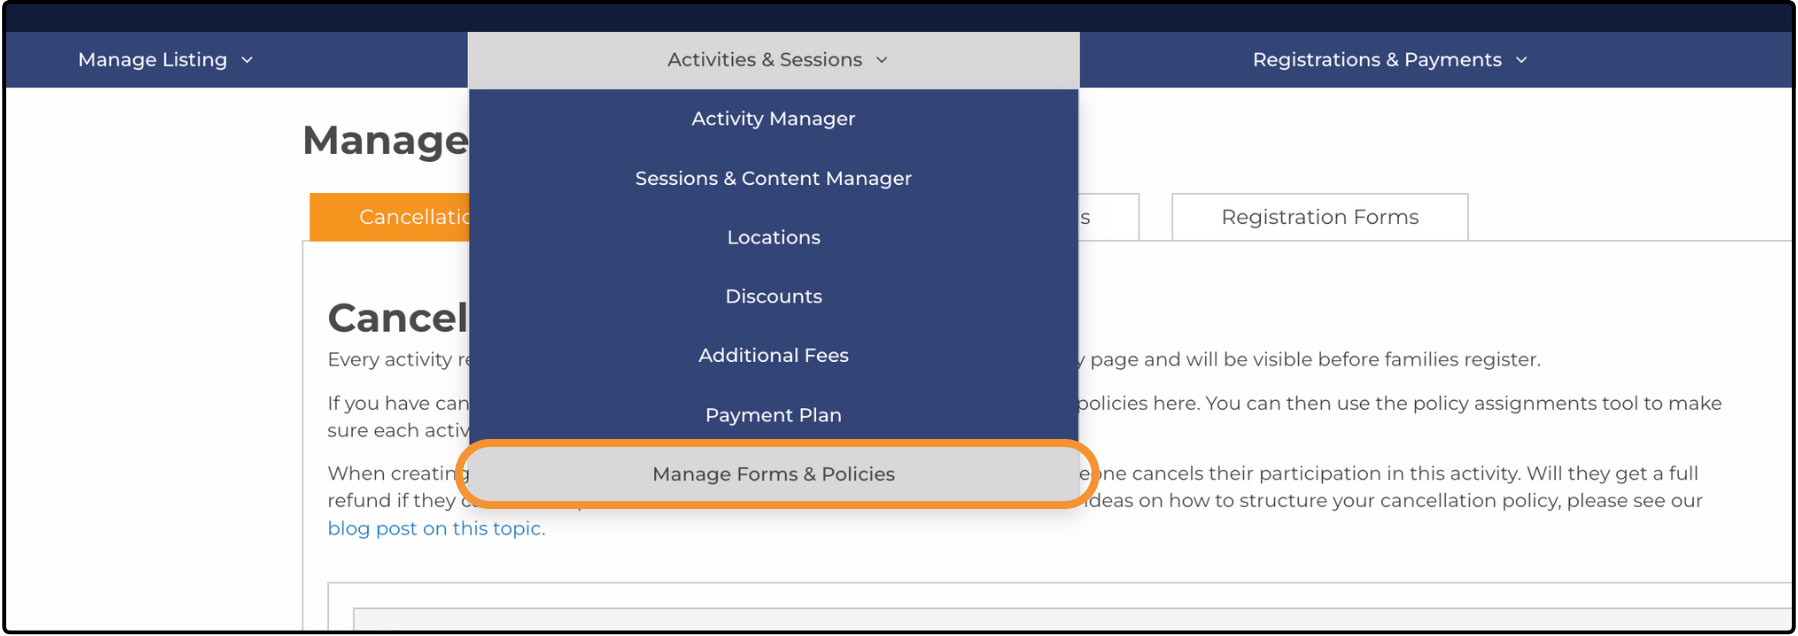
You can access the forms menu from the dashboard. Navigate to Activities & Sessions > Manage Forms & Policies.
Form Components ↑
Cancellation Policy
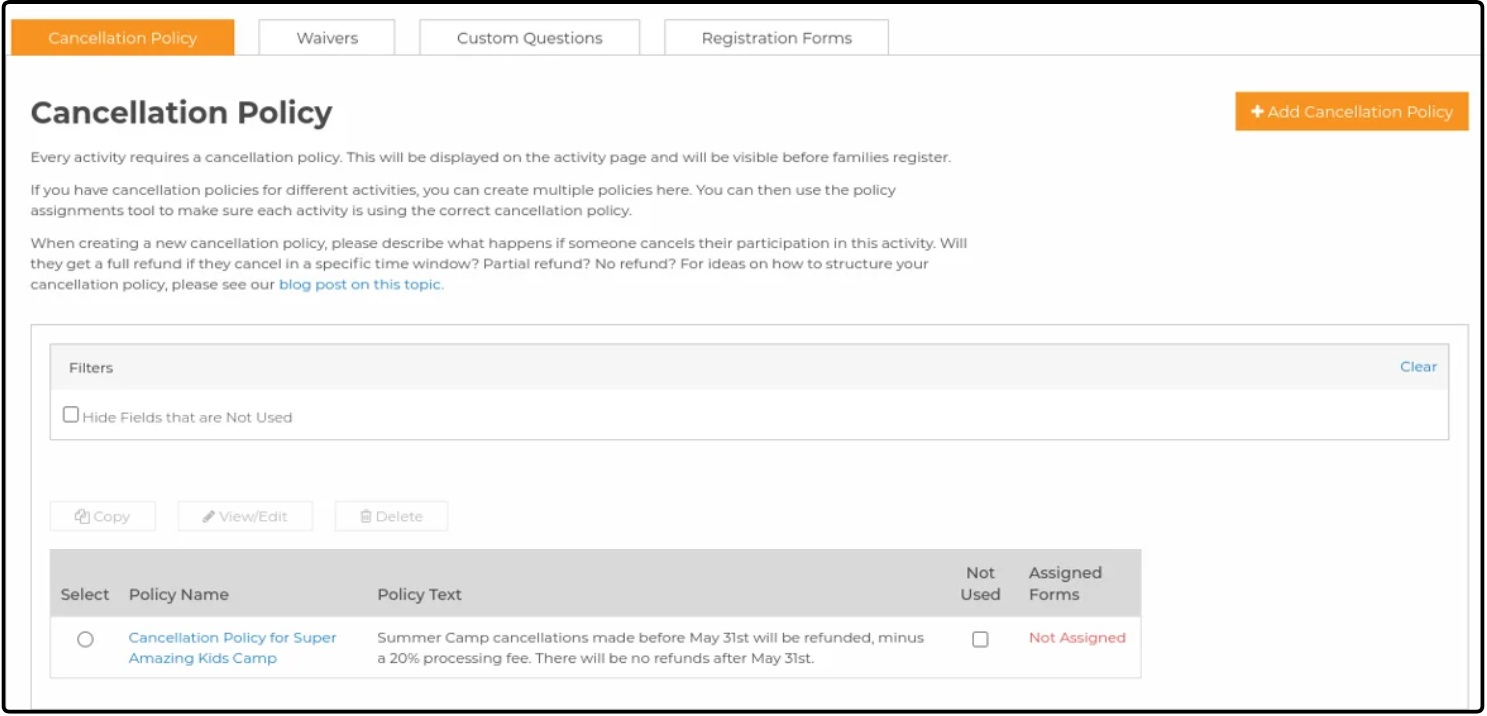
A cancellation policy is required for registrations on ActivityHero. It informs families about what happens if they cancel their registration and is displayed during the registration process so they can accept it before completing their registration.
To Create a Cancellation Policy ↑
- Navigate to your dashboard and hover over Activities & Sessions.
- Click Manage Forms & Policies.
- Navigate to the Cancellation Policy tab (highlighted at the top).
- Click Add Cancellation Policy.
- Copy and paste your policy information into the text editor or draft it directly.
- Give the policy a name, assign it to a registration form, and click Save.
Waivers
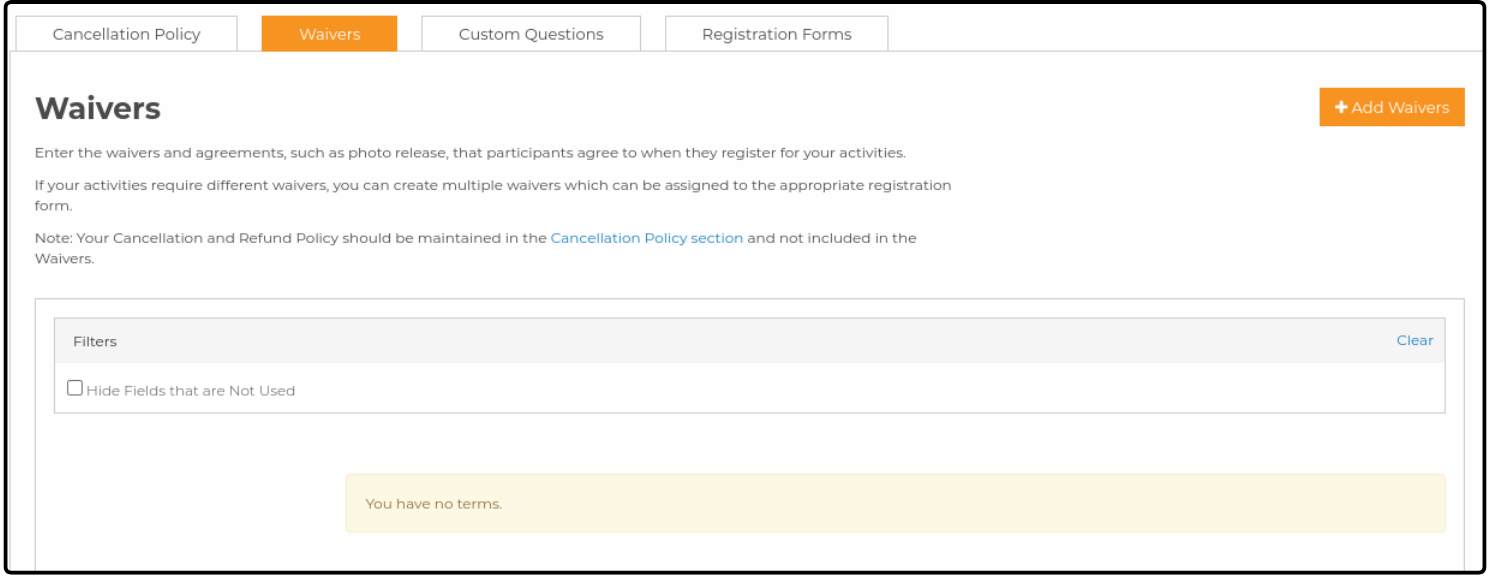 Waivers inform families about additional policies they should be aware of. A waiver is not required, but if you add one, it is displayed below the cancellation policy during registration so families can accept it before completing the registration process. If different activities require different waivers, you can create multiple waivers and assign them to the appropriate registration forms.
To Create a Waiver ↑
- Navigate to Manage Forms & Policies from your dashboard.
- Click the Waivers tab.
- Click Add Waiver.
- Copy and paste your policy information into the text editor or draft it directly.
- Name the waiver, assign it to a registration form, and click Save.
Standard Registration Questions
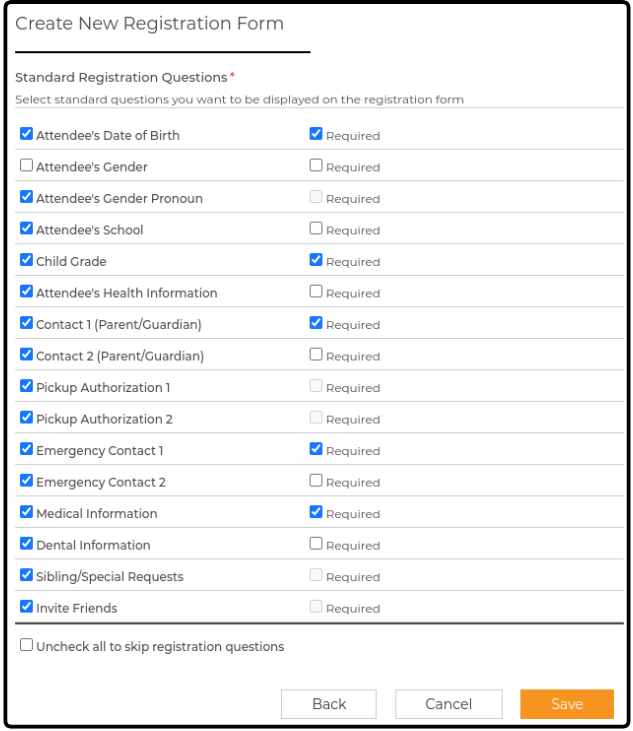
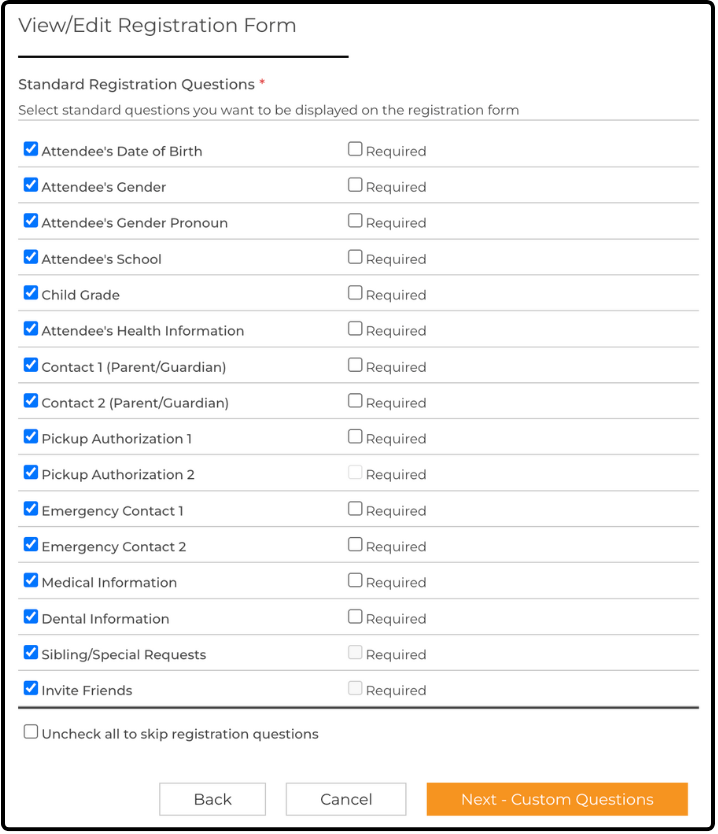
When creating a registration form, you can select from a set of standard registration fields available to you. You can specify which of these fields are required for the user to complete their registration. You can also uncheck all boxes to skip these registration questions.
Note: If you want the participant's age or grade to be verified during the registration process to make sure that it is a valid age/grade for your session, you must make date of birth or grade a required question.
To create a registration form:
- Navigate to Manage Forms & Policies from your dashboard.
- Click the Registration Forms tab.
- Click Add Registration Form.
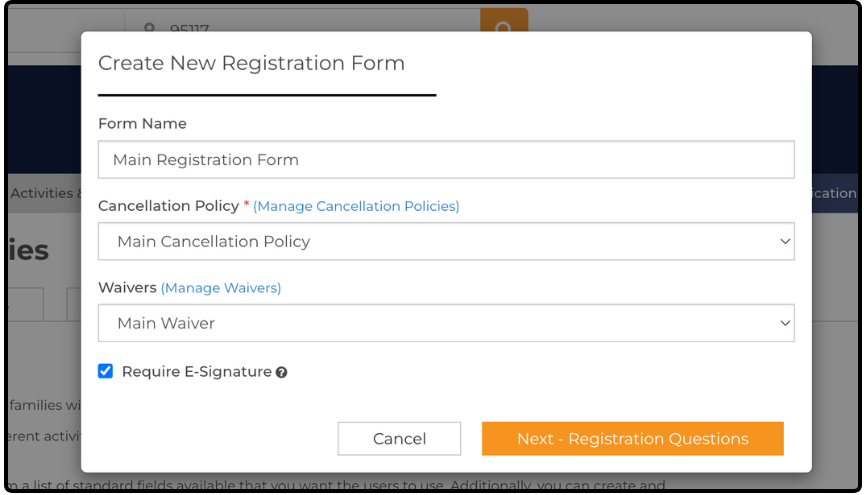
- Name the form, select a cancellation policy, and, if applicable, select a waiver.
- Click Next - Registration Questions to select the standard fields.
- Use checkboxes to select displayed fields (left column) and required fields (right column).
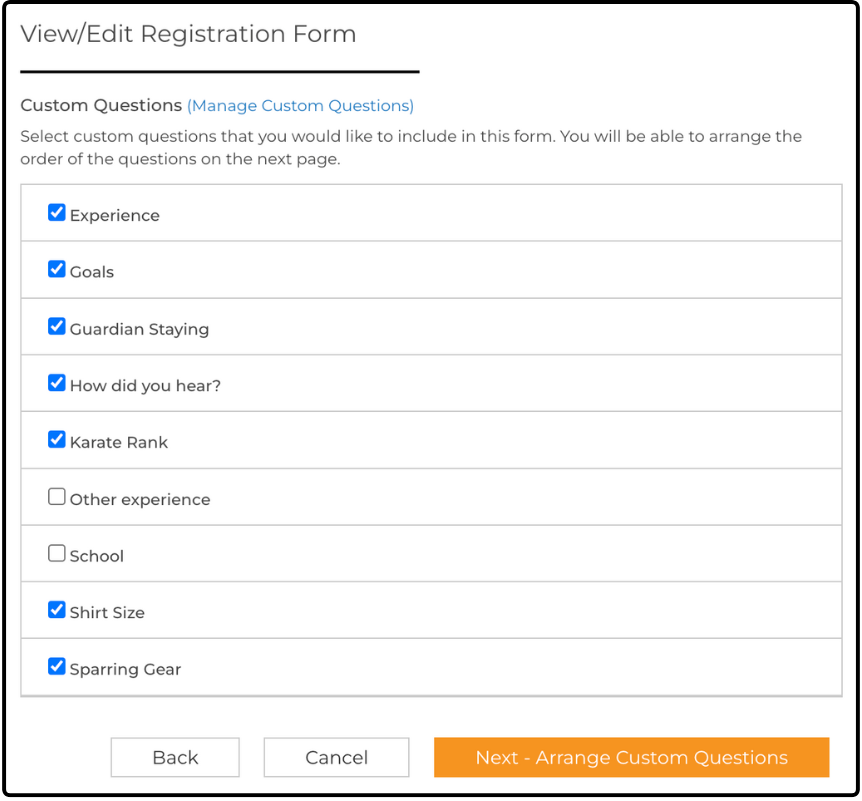
- If needed, add custom questions (explained in the next section).
- Click Save to finalize your registration form.
Custom Questions
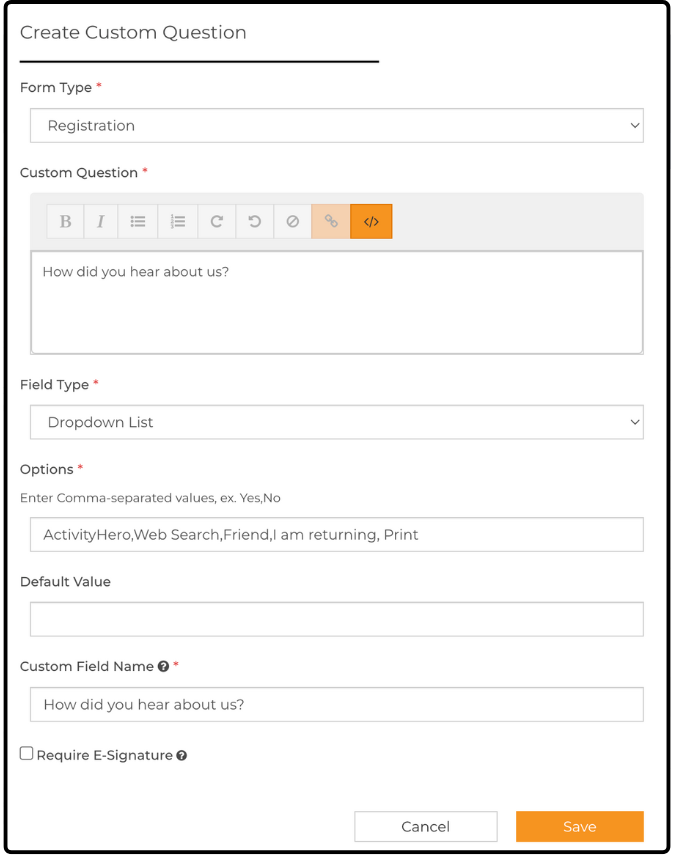
You can create your own custom questions that the user answers while filling out the registration form (e.g., T-shirt size, skill level) or when recording attendance (e.g., reason for leaving).
To access this feature, navigate to Activities & Sessions > Manage Forms & Policies > Custom Questions in the dashboard.
You can create custom questions and assign them to registration forms or attendance tracking. For more information on attendance tracking check out our help article: How Do I Track Attendance in ActivityHero?
To create a custom question:
- Click Add Custom Question.
- Select whether it is for Registration or Attendance.
- Type your question in the text editor.
- Select a field type based on the response format:
- Text Box - Open-ended responses
- Multiple Checkboxes - Multiple selections
- Dropdown List, Radio Button, or Checkbox - Single-choice answers
- File Upload - Request a file from families, e.g., vaccination records or another document. The supported formats are PDF, image, DOC, and CSV. Click here for more information.
- If required, add predefined options that can be selected (separate with commas, no spaces).
- Set a default option (optional).
- Assign a Custom Field Name to identify the question when adding it to registration forms.
- Mark whether a signature is required. This applies only to registration forms.
Assembling the Form ↑
Once all of the above components have been created, you can assemble them to create the form. Here are the steps:
Step 1: Create your form and assign a cancellation policy and waiver. You can also enable E-Signatures here, allowing families to sign during the registration process. For more details, check out our help article: How Do I Take E-Signatures?
Step 2: Assign Standard Registration Questions
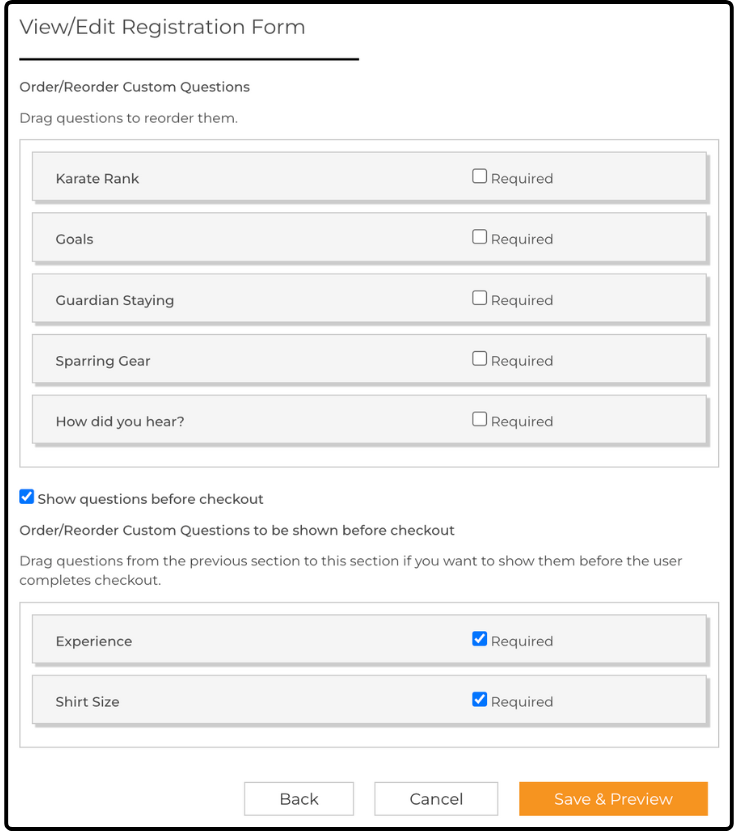
Step 3: Assign Custom Questions
Step 4: Order Custom Questions
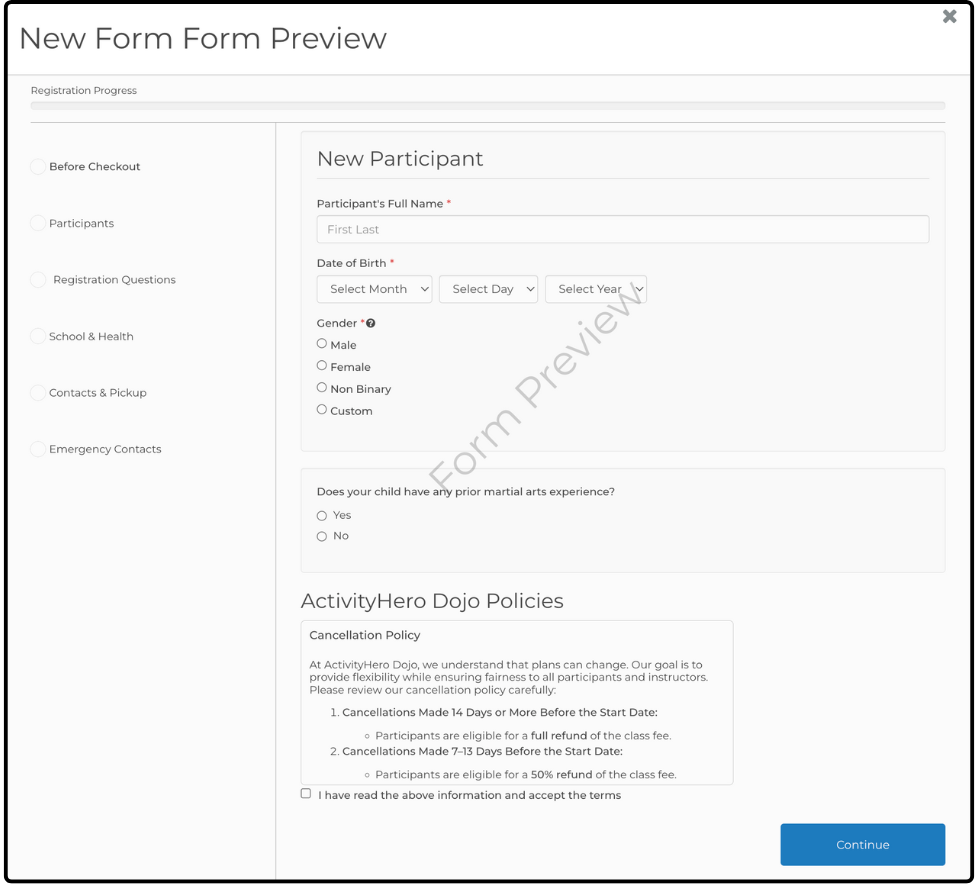
Step 5: Preview Form
Once the form is set up with all the components as described above, you can preview the form and assign it to one or more activities.
Step 6: Assign the Form to an Activity ↑
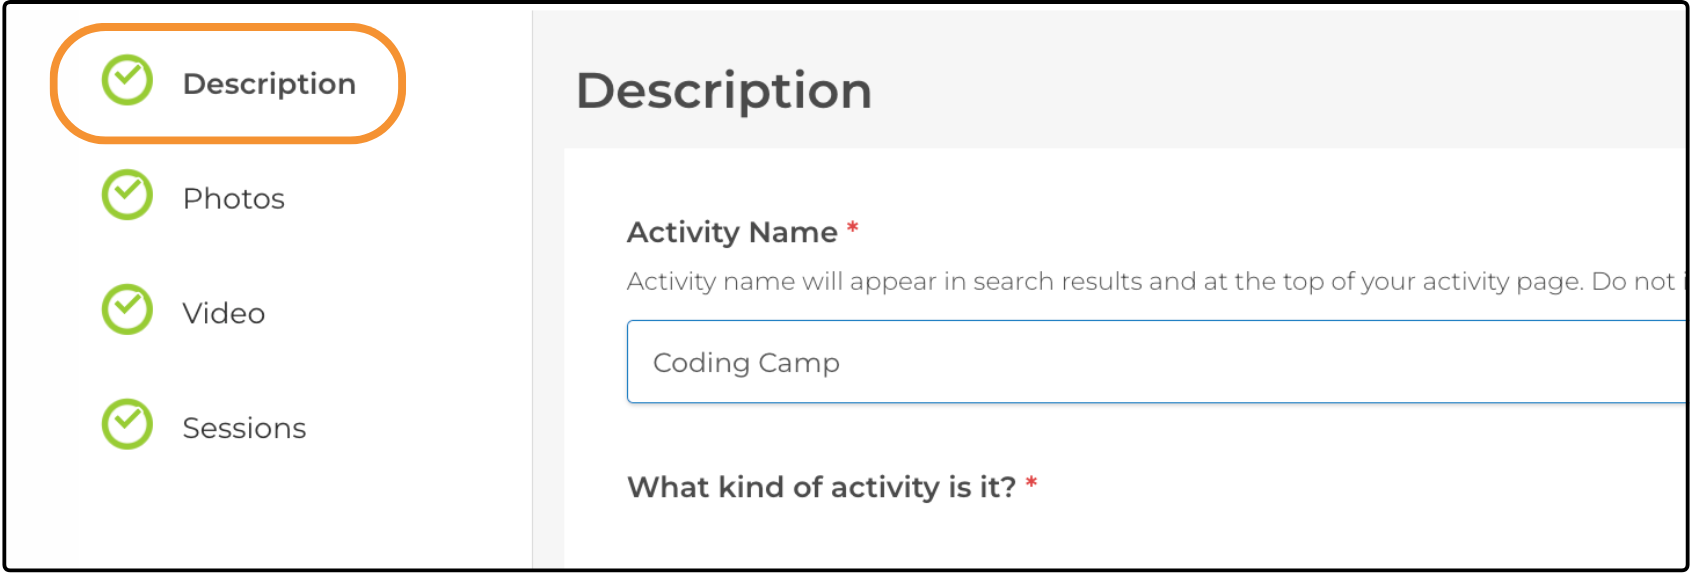
- Navigate to your dashboard and hover over Activities & Sessions.
- Click Activity Manager.
- Select the activity you want to update.
- In the left-side menu, click Description.
- Scroll down to the Registration Form field.
- Select the form you just added.
Families can now use this form to register for sessions in this activity.
Related Articles ↑
Was this article helpful?
That’s Great!
Thank you for your feedback
Sorry! We couldn't be helpful
Thank you for your feedback
Feedback sent
We appreciate your effort and will try to fix the article