Copying a past session can save time if ages, times, or other key details remain the same.
- Use Copy if you want to duplicate all of the session information.
- Use Add Dates if you want to keep the same details but change the dates.
Copy a Session
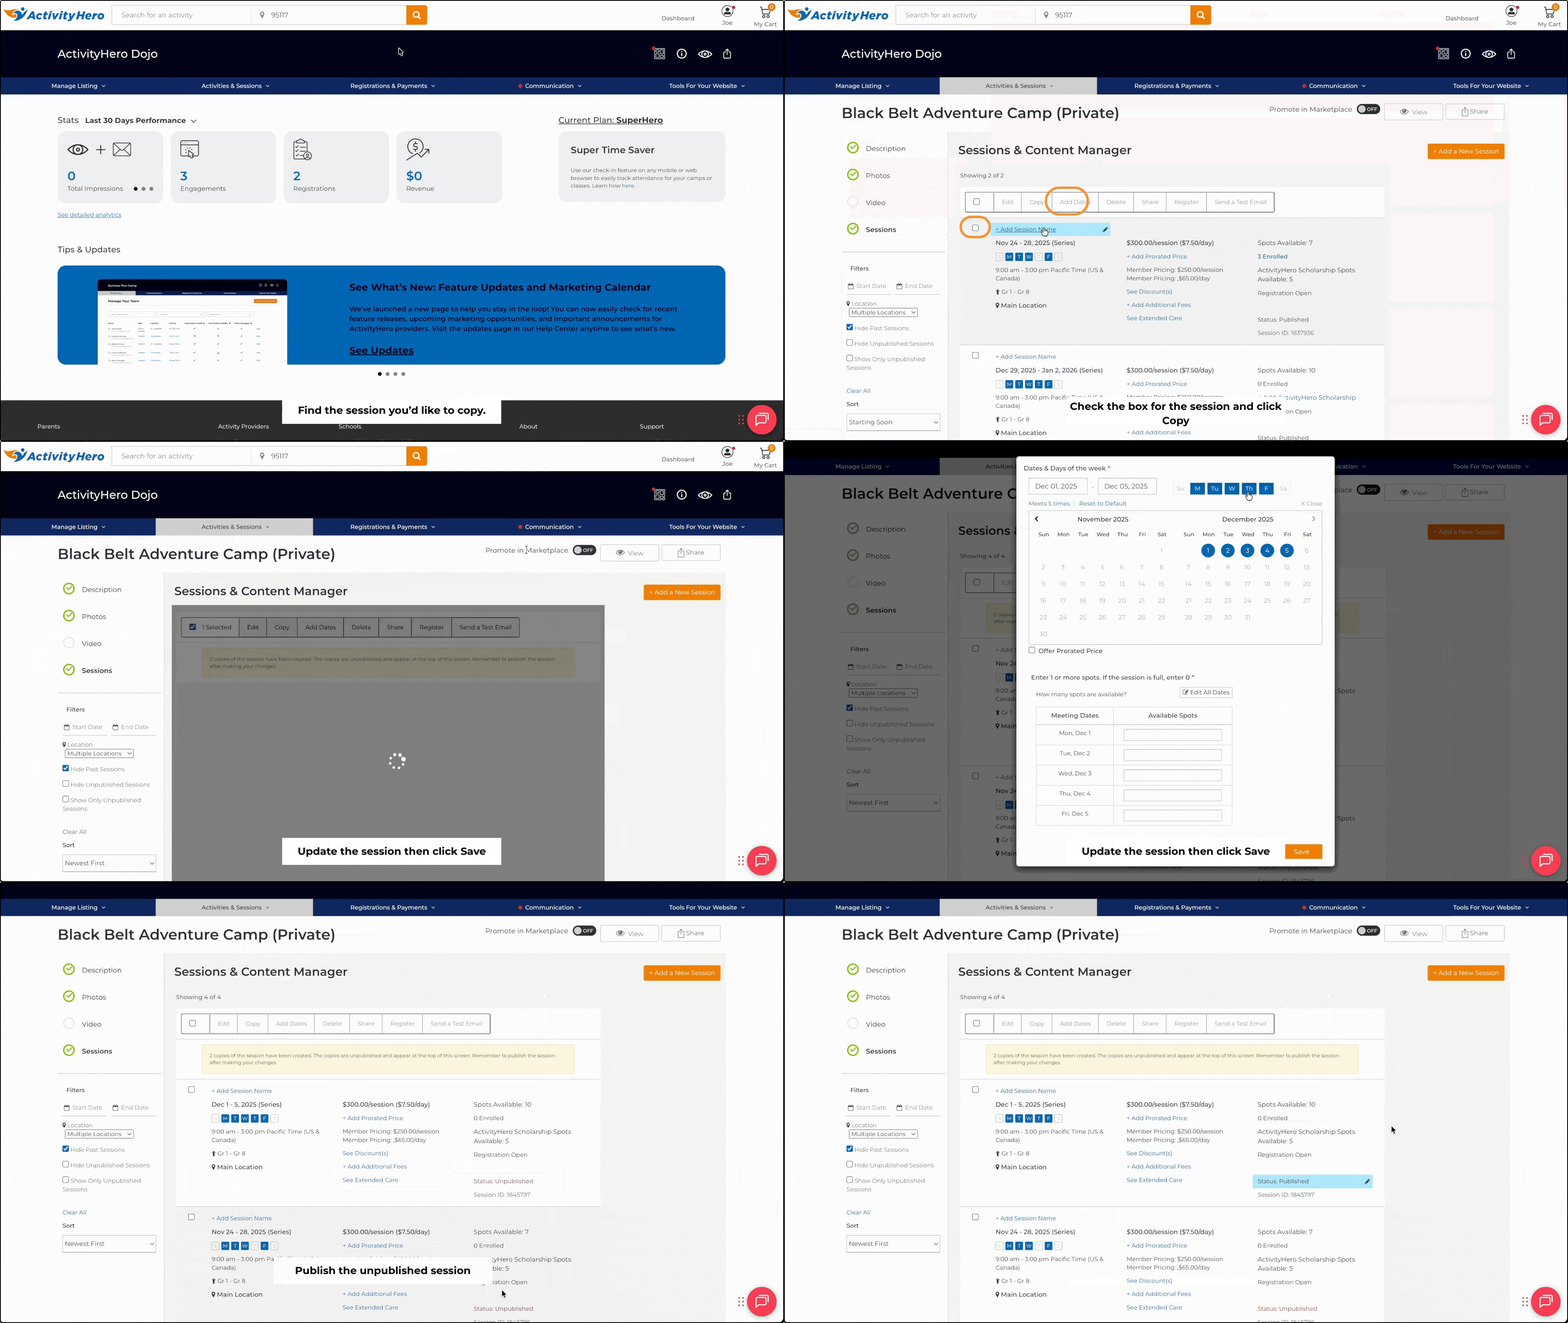
- From the dashboard, navigate to Activities & Sessions > Sessions & Content Manager.
- Find the session you want to copy, then select the check box on the left.
- Click Copy near the top of the page.
- Select how many copies you want to make (up to ten at once).
- Your new copies appear at the top of your sessions list as Unpublished.
- Edit any details as needed, click Save, and then publish the copied sessions.
Add Dates ↑
The Add Dates feature is a quick way to create new sessions using the same details but with updated dates.
Steps to Add Dates
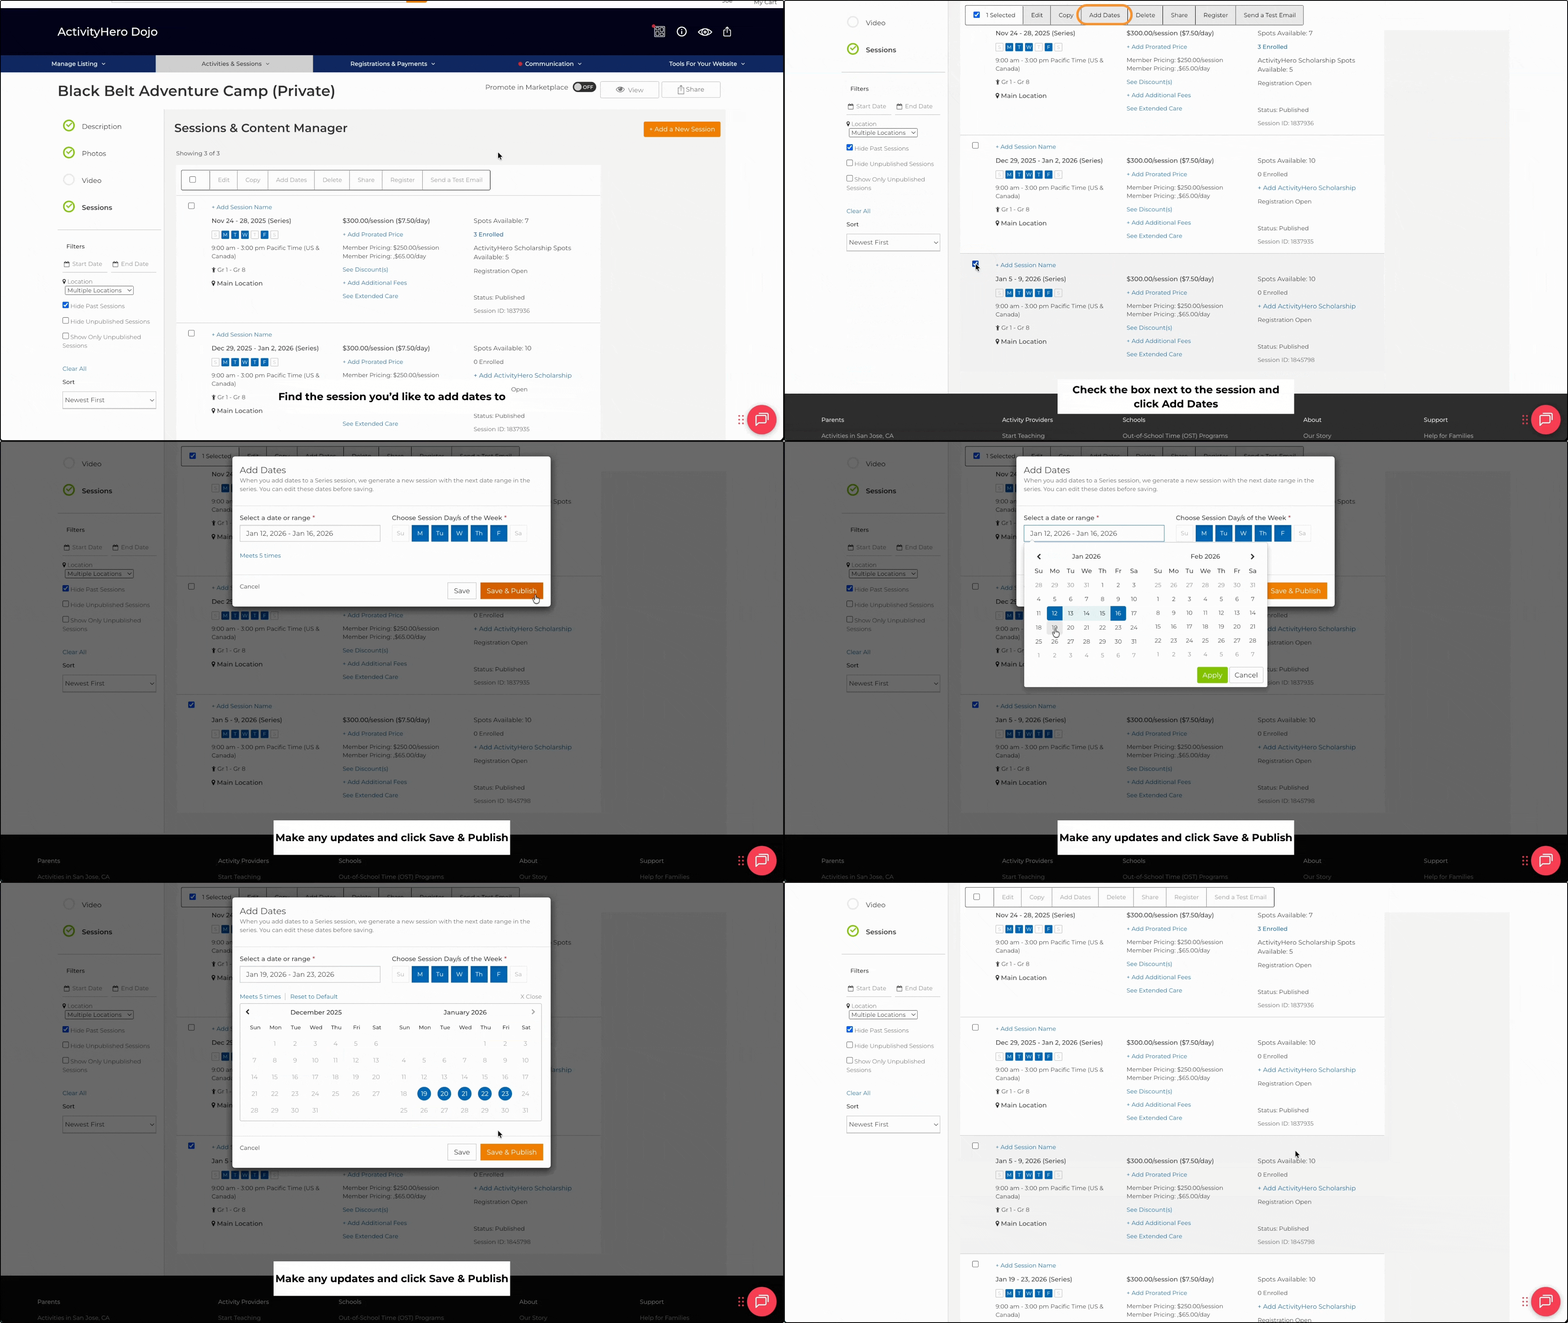
- From the dashboard, navigate to Activities & Sessions > Sessions & Content Manager.
- Find the session you want to add dates to, then select the check box on the left.
- Click Add Dates near the top of the page.
- The next logical date range is populated automatically.
- e.g., if your camp session runs 7/17-7/21 (Mon-Fri), the new session defaults to 7/24-7/28 (the following Mon-Fri).
- Review the dates, then click Save & Publish.
Was this article helpful?
That’s Great!
Thank you for your feedback
Sorry! We couldn't be helpful
Thank you for your feedback
Feedback sent
We appreciate your effort and will try to fix the article