The waitlist collects all families interested in registering for full sessions in one convenient place.
Joining the Waitlist
How to Access the Waitlist
Waitlist Report Overview
Inviting Someone Off the Waitlist
Waitlist Automation
Joining the Waitlist
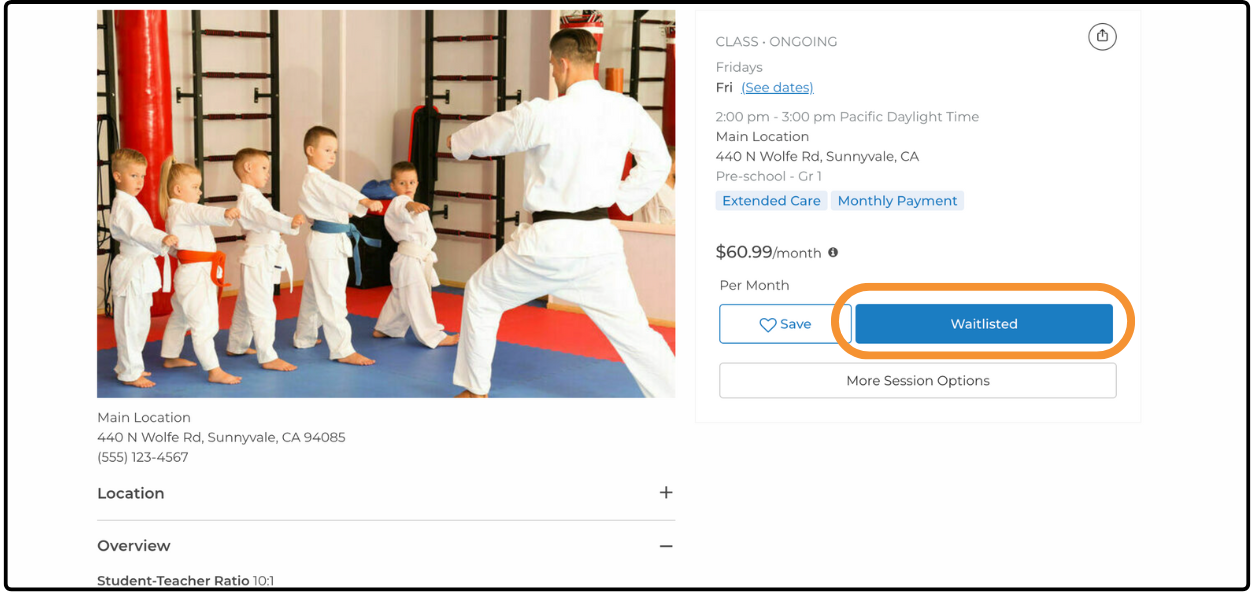
When a session has no remaining spots, families are prompted to join the waitlist and add participant details.
How to Access the Waitlist ↑
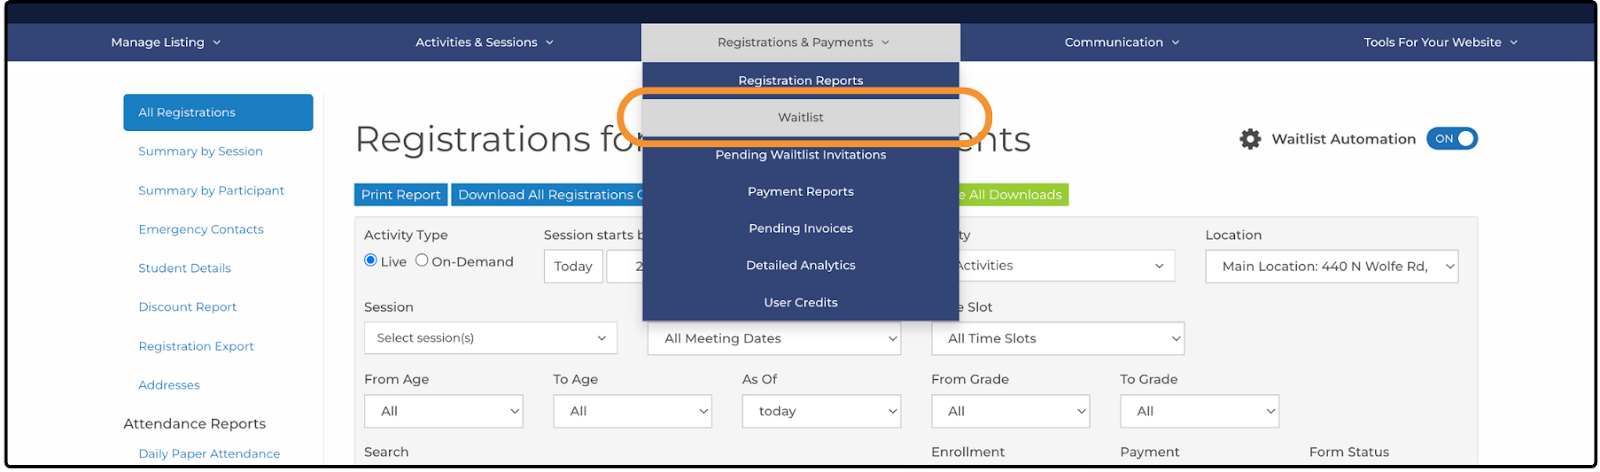
- From your dashboard, hover over the Registrations & Payments tab.
- Select Waitlist from the drop-down menu.
A list of all participants currently on the waitlist is displayed. You can use the filter and sort options to narrow down the results. For more information on filtering and sorting, see our help article: What Reports are there in ActivityHero?
Waitlist Report Overview ↑
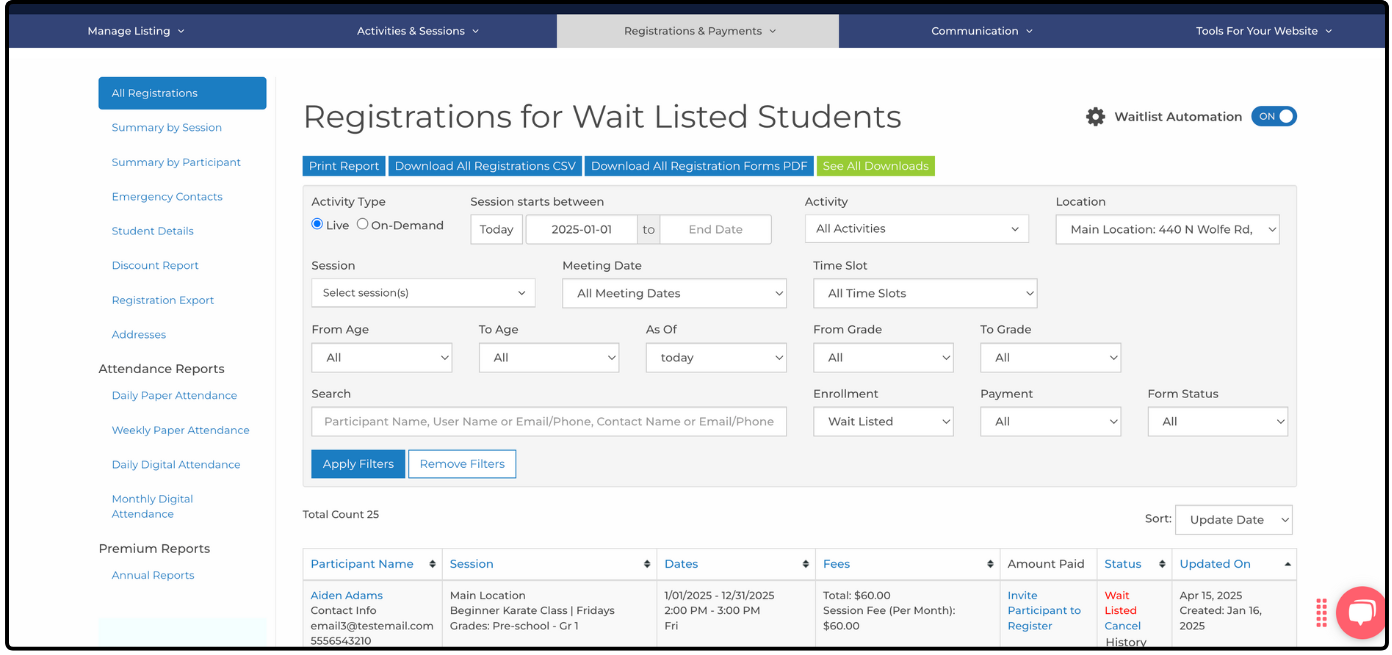
The waitlist view includes the following columns:
- Participant Name - Displays the participant's name, contact details, and family information. Note: MarketingHero plans do not display participant information for waitlisted entries.
- Session - Displays the session the participant is waitlisted for.
- Dates - Lists the dates, times, and days the session is held.
- Fees - Displays the cost of the session.
- Amount Paid - Lets you invite the participant to register.
- Status - Displays the participant's current waitlist status, with options to cancel or view history.
- Updated On - Displays the date the waitlist entry was created or last updated.
Inviting Someone Off the Waitlist ↑
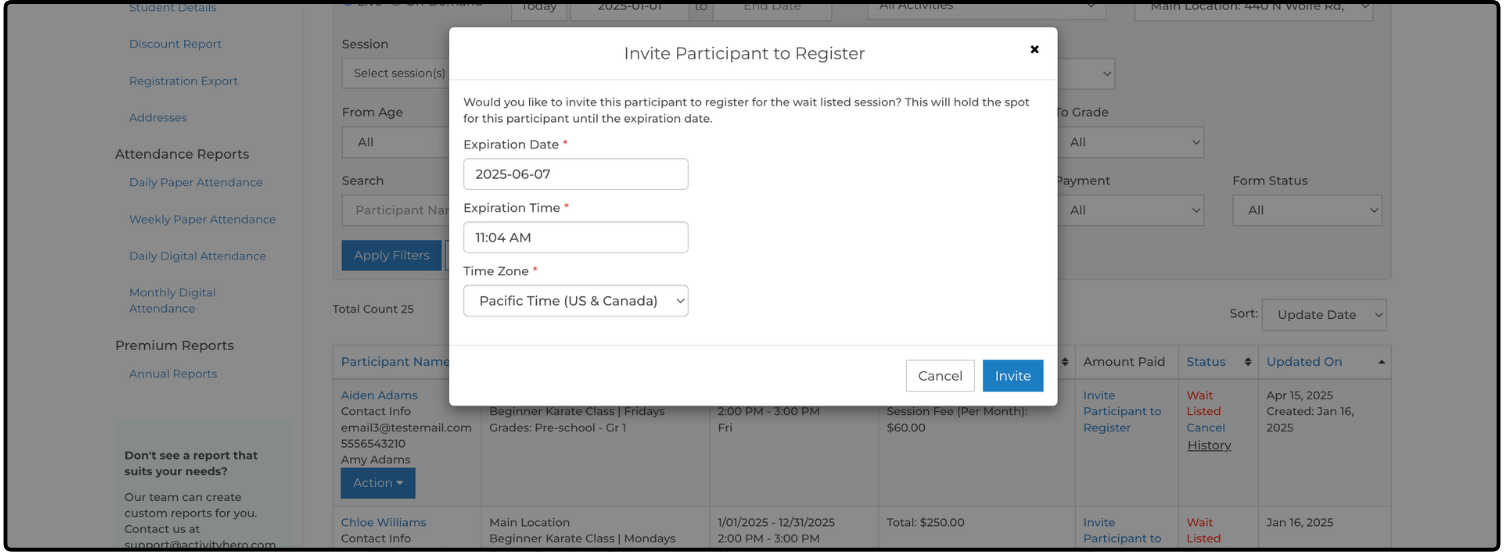
Find the participant you want to invite and click Invite Participant to Register. Type the expiration date by which the user can register for that session. After the expiration date passes, the user cannot register and needs a new invitation.
Click Invite to send the user an email inviting them to register for this session before the expiration date. After they complete the registration, they are automatically enrolled in the session.
The user can add other services (e.g., extended care, additional fees), use any promo codes they have, and is eligible for any available discounts during checkout.
Waitlist Automation ↑
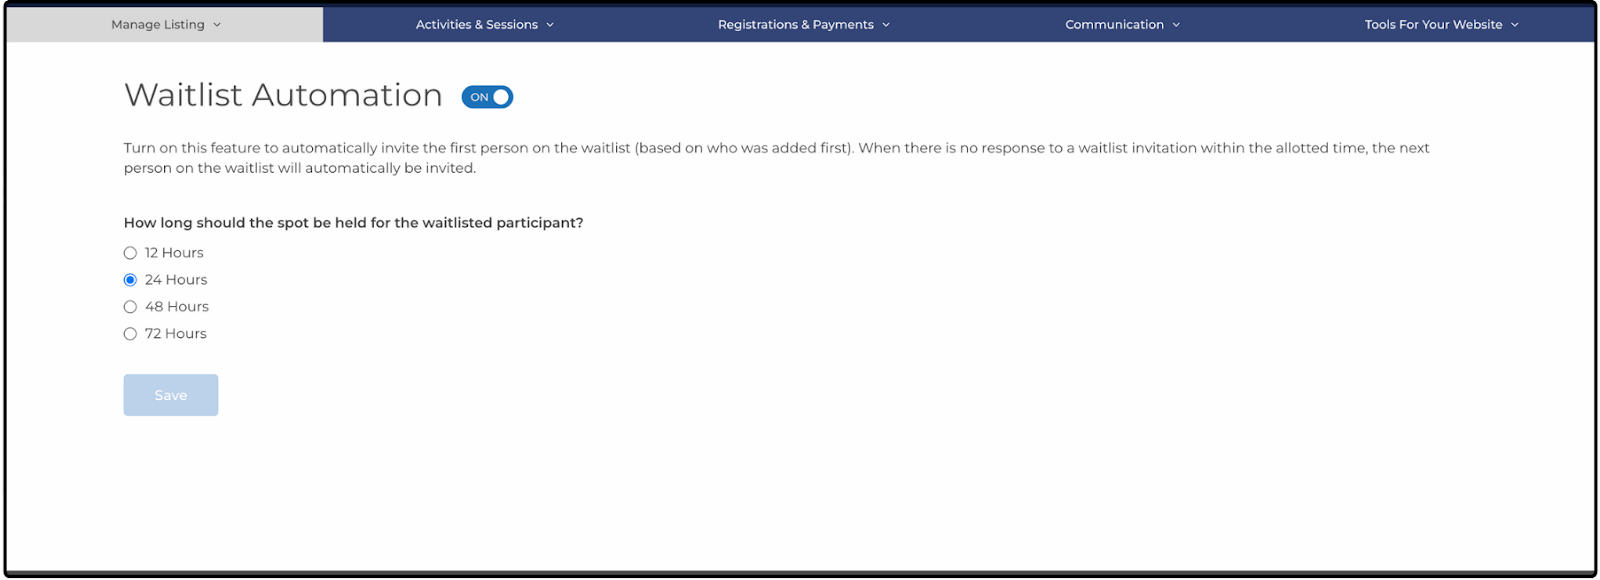
Enable Waitlist Automation to automatically invite participants when spots become available-no manual work needed. For more details, visit our help article: How Do I Use the Waitlist Automation Feature?
Related Articles ↑
Was this article helpful?
That’s Great!
Thank you for your feedback
Sorry! We couldn't be helpful
Thank you for your feedback
Feedback sent
We appreciate your effort and will try to fix the article